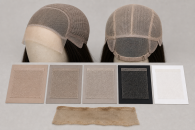
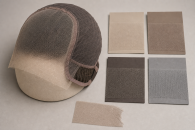
360 Lace Frontals: Fit, Material, and Construction Guide

Direct answer: Choose a 360 lace frontal by matching its complete circumferential band to the front hairline, temples, sides, ear routes, and nape while separately planning the open central crown. Unlike a standard frontal, the lace continues around the back; unlike a full-lace cap, the center is not one complete lace panel system. Measure local band depth in all four zones, inspect the joining seam and every directional change, and dry-fit the loop with neutral adjustment. Ponytail styling is possible only when the exact nape construction, density, attachment, and prepared base support it. Do not tighten the circumference to close a crown gap or use the nape edge as a lifting handle.
Draw the circumference as four connected zones
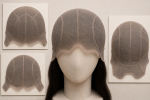
Map the front arc, right side, nape, and left side of the relaxed lace band, including local width, hair direction, knot field, seam junction, ear curves, nape contour, and reinforcement. Mark the central crown opening and document the separate weft, cap, bundle, or other supported construction intended to fill it. Preserve a closed-loop measurement without stretching the band.
Confirm it is a band rather than a full cap
Turn the piece inside out and identify continuous lace around the perimeter plus the central opening or separate crown construction. Record every transition into wefts, elastic, straps, and any crown insert. Marketing photos can hide the center. A circular hairline does not prove full-lace coverage, and a lace-looking crown should not be assumed without direct evidence.
Measure the relaxed closed loop
Record circumference along a consistent band reference while the piece rests without extension. Then measure front, side, and nape band depth separately because coverage can vary around the loop. Compare with prepared-hair landmarks and the exact cap or bundle plan. Do not stretch a smaller loop to a target number or infer local depth from total circumference.
Map front and temple geometry
Document the front arc, temple turns, sideburn zones, ear approaches, knot density, and reinforcement. Check whether each direction change lies flat without narrowing the mesh. The front can fit while the side route remains too short or steep. Do not trim ear curves or add product before the full loop and nape have been aligned.
Inspect side continuity around the ears
Follow both sides from temple to behind-ear route, noting width, hair direction, seam location, and contact with tabs or hardware. Confirm clearance and symmetry during slow movement. A continuous band should not cross the ear, concentrate pressure behind it, or rely on one side being pulled farther than the other.
Fit the nape as a distinct curve
Record nape width, depth, center point, side rises, density, edge finish, and relationship to prepared hair. Check sitting, looking down, and gentle head turns because nape lift can appear only in motion. Do not compensate with a tighter front, stronger rear bond, or an unsupported low placement that loads the skin or lace.
Plan the open crown independently
Define the area inside the band and how separate wefts, bundles, cap fabric, or another supported system will fill it. Record seam allowance, track direction, density transition, ventilation access, and removal sequence. Closing the center is a construction task, not a reason to pull the perimeter inward. Keep crown hardware and tracks from loading the lace ring.
Evaluate ponytail geometry without a promise
If an elevated style is intended, trace how rear and side hair direction, density, band width, and nape attachment behave before installation. A 360 label does not guarantee a high ponytail, hidden nape, or secure upward movement. Test only within the supported configuration and stop for edge lift, mesh narrowing, pressure, or exposed junctions.
Audit the loop junction and repairs
Find the manufacturing seam or other point where the band closes. Inspect overlap, stitching, tape, knot density, stiffness, and nearby stretch. Also map repaired zones and local color change. A junction can be structurally sound yet bulky for one landmark. Do not place maximum tension, hardware, or repeated solvent contact directly on an unsupported join.
Dry-fit the complete circumference
Center front and nape references first, then align both side routes and the open crown without products. Observe rotation, band twist, edge ripple, ear pressure, nape rise, and seam load during ordinary movement. Revisit dimensions when correction in one zone displaces another. A loop that passes only while held by hand has not passed fit.
Attach and release by quadrants
Follow the documented route and handle front, right side, nape, and left side as observable sections. Keep force balanced and preserve access to the crown and junction. During removal, release every quadrant and all crown construction before lifting the band. Never peel the whole circumference from one starting point or use the hair as leverage.
Retire a loop that loses continuity
Set aside the frontal for a split junction, torn nape, damaged ear curve, connected enlarged openings, failed reinforcement, permanent twist, uneven recovery, hard residue, displaced knots, or circumference that no longer returns. Added adhesive, elastic, hair, or crown tracks cannot restore a broken perimeter load path.
Decision table
| Checkpoint | Continue when | Stop or replace when |
|---|---|---|
| Loop | Relaxed circumference and local depths match all four zones | Band is stretched, twisted, or displaced to close the route |
| Nape | Contour stays seated through ordinary movement | Lift, pressure, wrong depth, exposed junction, or concentrated bond |
| Crown | Separate fill plan meets the band without pulling it inward | Gap is hidden by tension, excess tracks, or loaded lace |
| Junction | Closing seam and repairs remain flat, intact, and accessible | Split, stiffness, hard residue, or hardware load |
| Condition | Perimeter, knots, edges, and measurements return near baseline | Tear, widening, twist, separation, or failed recovery |
Use public guidance to limit circumferential force
AAD sources support avoiding painful repeated pulling but do not validate a 360 construction or ponytail result. FDA context applies only to cosmetics, adhesives, and removers under their current directions. The closed-loop map, crown plan, product-free fit, and observed condition control.
- AAD traction guidance: Do not tighten the loop to correct a local geometry failure.
- AAD extension precautions: Keep the complete attachment system clean and low tension.
- FDA hair-products overview: Review products independently from the 360 construction label.
Define the crown fill and hair format separately
Extension guides help select the hair used inside or around the band. They do not prove loop dimensions, nape fit, crown integration, seam integrity, or ponytail suitability.
- hair extension selection guide: keeping extension fiber and attachment choices outside this wig-equipment decision
- hair extension type guide: separating extension formats from a complete wig and cap system
- hair crown extension guide: handling shade and placement as a separate reader task
Final checklist
- Front, sides, nape, junction, and local band depths are recorded at rest.
- The central crown opening and separate fill construction are explicit.
- Both ear routes and the nape stay aligned during a product-free movement check.
- Attachment and release proceed through all four observable quadrants.
- Split seams, torn nape, widening mesh, permanent twist, residue, or failed recovery trigger retirement.
A 360 label does not guarantee ponytail performance
This guide does not promise an invisible perimeter, high-ponytail suitability, comfort, secure hold, airflow, styling freedom, wear duration, or damage-free removal.
A 360 lace frontal is a closed-loop, front, side, nape, open-crown, junction, density, fitting, quadrant-release, and condition decision.