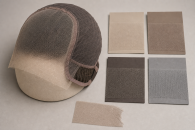
Full-Lace Wig Caps: Fit, Material, and Construction Guide

Direct answer: Choose a full-lace wig cap by verifying actual lace-panel coverage across the front, crown, both sides, and nape, then mapping seams, knots, reinforcement, directional stretch, density, hardware, and repair zones. A full-lace cap covers the central crown rather than leaving the open center of a 360 frontal, but it can still contain multiple panels, seam tape, elastic, or other components. Match the entire cap to circumference, depth, ear-to-ear arcs, temples, and nape before attachment. Parting scope depends on ventilation and hair direction, not the name alone. Retire connected tears, seam separation, pulled knot fields, permanent panel distortion, failed reinforcement, or a cap that no longer returns to its measured shape.
Map full-head coverage panel by panel
Turn the dry cap inside out on a broad rounded support and trace every lace panel across the front, crown, sides, and nape. Record panel boundaries, seam allowances, knot fields, density, direction, reinforcement, stretch axes, ear and nape geometry, adjustment parts, and repaired zones. Note any nonlace component rather than assuming that full-lace means one seamless material.
Verify complete crown coverage
Inspect the underside and confirm that lace or the specifically disclosed full-cap material continues across the center crown. Distinguish it from a circumferential band with a separate wefted or open middle. Photograph front, top, side, and nape views. If a nonlace insert exists, record it precisely rather than forcing the product into a pure full-lace description.
Draw the panel architecture
Trace each front, crown, side, rear, and nape panel and mark the direction of its mesh. Record whether seams are straight, curved, overlapped, taped, bound, or reinforced. Panel count is not a quality score. The useful question is how the joined shapes distribute fit, movement, hair load, and service access across the whole head.
Inspect seam allowances and intersections
View the cap at its intended rounded shape and follow every seam, especially multi-panel intersections at crown, temples, and rear. Record width, stiffness, thread, tape, knot proximity, repair, and any lifted edge. A flat loose cap can hide a ridge that appears only under curvature. Do not trim seam allowance or add solvent merely to reduce bulk.
Map knot fields and density direction
Record ventilation pattern, knot type when disclosed, spacing, strand direction, and density by panel. Compare the hairline, part, crown, sides, and nape rather than relying on one percentage. Look for enlarged openings, pulled clusters, missing hair, and abrupt direction changes near seams. Do not pluck or bleach as an inspection method.
Describe parting scope from actual ventilation
Identify where hair can be moved within maker-supported limits and where seams, reinforcement, density, or direction restrict the result. Full-lace does not necessarily mean every line can function as an equal part. Preserve a map of usable zones and keep planned parts away from damaged mesh or high-load junctions.
Measure directional stretch by panel
Record relaxed cap dimensions before any small maker-permitted extension. Observe which panels respond in circumference, depth, diagonal, or not at all, and whether seams or knots narrow surrounding openings. Softness does not establish reserve in every axis. Never stretch one crown panel to replace missing nape depth or temple reach.
Trace adjustment and attachment loads
Follow straps, elastic, combs, clips, tape zones, adhesive zones, and other supported parts into their reinforced bases. Determine which panel or seam receives each force. Hardware attached to lace can remain smooth yet sit poorly for one preparation. Added components should not concentrate load at a knot field, repaired zone, or panel intersection.
Dry-fit all landmarks as one system
Use measured prepared hair and neutral adjustment. Seat the front, crown depth, ear arcs, temples, side panels, and nape, then observe movement without products. Record seam ridges, panel buckle, lace ripple, rotation, nape rise, hardware pressure, and directional pulling. Correct the construction or size rather than tightening until fine panels conform.
Choose products by the narrowest component limit
Review cleanser, conditioner, tint, cosmetic, tape, adhesive, remover, heat, and drying against lace fiber, knots, seam thread, tape, elastic, hardware, and hair. A full-lace label does not authorize one product across every panel. Keep products within stated contact zones and preserve an untreated baseline for later condition checks.
Support the whole cap during removal and washing
Release every attachment before lifting and keep the cap broad rather than pulling from the hairline or crown. During cleaning, support seams and knot fields, guide product through the stated route, rinse intersections, and dry the complete cap in its intended shape. Ends or front lace can feel dry while crown seams and dense knot fields remain damp.
Repair only with an explicit service boundary
Map each run, hole, pulled field, loose seam, lifted tape, failed elastic, and previous repair. A qualified repair decision should define the exact zone and preserve surrounding panel geometry. Do not bridge connected damage with adhesive, cosmetics, added hair, or improvised stitching. Retire the cap when continuity, fit, or service access cannot be restored.
Decision table
| Checkpoint | Continue when | Stop or replace when |
|---|---|---|
| Coverage | Front, crown, sides, and nape have documented full-cap construction | An open-center band is mistaken for full lace |
| Panels | Seams and intersections lie flat in intended cap shape | Ridge, lift, split, loaded junction, or hidden repair |
| Knots | Density and direction remain inspectable in every panel | Pulled field, widening holes, missing clusters, or abrupt failure |
| Fit | All landmarks seat with directional reserve and neutral adjustment | Buckling, rotation, nape rise, seam pressure, or maximum stretch |
| Condition | Panels, seams, knots, reinforcement, and dimensions return near baseline | Connected tear, separation, hard residue, distortion, or failed recovery |
Use health guidance as a cap-load boundary
AAD guidance supports avoiding painful repeated pulling but does not establish full-lace quality, parting freedom, or fit. FDA context applies to hair and cosmetic products within their directions, not cap certification. The panel map, measured landmarks, product-free fitting, and material condition control.
- AAD traction guidance: Do not force panels into place with repeated tension.
- AAD extension precautions: Keep attachment clean and stop if pulling becomes painful.
- FDA hair-products overview: Evaluate each product against all joined cap materials.
Resolve hair selection outside the cap map
Related extension pages help classify fiber and attachment choices. They do not verify complete crown coverage, panel seams, knot fields, parting scope, or cap fit.
- hair extension selection guide: keeping extension fiber and attachment choices outside this wig-equipment decision
- hair extension type guide: separating extension formats from a complete wig and cap system
- hair crown extension guide: handling shade and placement as a separate reader task
Final checklist
- Complete front, crown, side, and nape coverage is verified from the underside.
- Every panel, seam, knot field, reinforcement, stretch axis, and repair zone is mapped.
- Parting scope follows actual ventilation and hair direction.
- The entire cap passes a measured product-free movement check.
- Connected tears, seam separation, pulled knots, failed reinforcement, residue, or distortion trigger retirement.
Full lace does not mean seamless or universally free-parting
This guide does not promise unrestricted parting, invisible construction, comfort, secure wear, airflow, durability, hold time, or damage-free removal.
A full-lace wig cap is a coverage, panel, seam, knot, stretch, parting, load-path, whole-cap-fit, care, repair, and retirement decision.