Lowlights: Placement, Sectioning, and Upkeep Guide

Direct answer: plan lowlights by deciding how much depth to add, where darker pieces should remain visible, and how much existing brightness should be preserved. Map the normal part, hairline, crown, sides, interior, and ends; choose a weave or slice size that matches the intended contrast; and strand-test the exact deposit formula on representative light and porous sections. Lowlights add darker pigment rather than creating lift, but shade selection and porosity can still produce an unexpectedly dark, flat, cool, or muddy result.
The most useful lowlight plan is not “make it darker.” It specifies depth difference, warmth or coolness, piece width, spacing, starting point, and the bright hair that must remain untouched. A few strategic darker pieces can restore dimension; too many can erase the brightness the reader wanted to keep.
Define the depth and contrast goal
Choose whether the lowlights should be subtle shadows, medium-contrast ribbons, a near-natural base restoration, or a transition away from very pale highlights. Compare the target with the current lightest and darkest zones. One or two levels of visible depth can read very differently from a dramatic brunette piece in blonde hair.
Write down:
- The desired darkest visible depth.
- Whether the result should look warm, neutral, or cool.
- The proportion of brightness that should remain.
- Which zones need depth most.
- Whether gray or natural root color should remain visible.
If the goal involves maintaining visible silver rather than covering it, compare the gray hair transition guide. Lowlights can add depth around gray, but they should not be presented as automatic full coverage.
Assess lightened hair and missing warmth
Previously lightened hair may have lost much of the warm underlying pigment that supports a natural-looking darker result. Applying a cool dark shade directly to very pale porous hair can create a hollow, gray-green, or overly ashy appearance. Some transformations require a label-supported warm filler or a staged professional process before the final lowlight shade.
Do not invent a filler formula from a generic color wheel. Product systems differ in pigment load, permitted combinations, and processing. Use the manufacturer’s instructions or a qualified colorist when moving several levels darker, correcting very pale hair, or working with uneven porosity.
The red hair color ideas guide provides context for comparing visible warmth and base color, but it does not supply a universal lowlight filler recipe.
Map where darker pieces should appear
View dry hair in its normal part and style. Mark the top surface, hairline, crown, sides, interior, and ends. Decide whether depth should sit mainly underneath, alternate through existing highlights, frame the face, or reconnect pale lengths with a darker natural root.
Common maps include:
- Interior depth: darker pieces beneath the surface so brightness remains dominant.
- Alternating dimension: lowlights placed between existing highlights.
- Root connection: selected darker pieces beginning near the root to soften a bright mid-length.
- Face-frame balance: depth behind bright front pieces so they remain defined.
- End restoration: selected lengths darkened only after porosity and filler needs are assessed.
Keep a written count by zone. The goal is controlled distribution, not an arbitrary number of packets.
Choose weave, slice, spacing, and start point
Fine weaves create diffused shadow, while larger weaves or slices create visible darker ribbons. Subsections must remain thin enough for complete saturation and secure isolation. Spacing determines how much light hair remains between dark pieces.
Decide where each lowlight begins. Pieces can start near the root, through the mid-length, or lower in the hair depending on the desired connection. Avoid painting every selected piece from scalp to ends by default. A pale end may need a different formula, filler, or shorter exposure than stronger new growth.
Practice the selection pattern before mixing. Keep the rhythm consistent across mirrored zones unless intentional asymmetry is part of the design.
Strand-test the palest and most porous zones
Test a representative pale strand, a porous end, a stronger mid-length, and any zone with uncertain prior color. Use the exact shade, ratio, packet material, subsection, saturation, timing, rinse, and after-color process directed by the label.
After drying, evaluate:
- Depth compared with the intended darkest point.
- Warmth or coolness in daylight and indoor light.
- Whether porous hair absorbed too much pigment.
- Whether the result looks dimensional beside untouched bright hair.
- How the strand feels after the complete process.
If the test is too dark, muddy, cool, warm, or uneven, revise the shade or service plan. Do not dilute, mix unrelated formulas, shorten or extend timing, or add filler unless the exact manufacturer system supports that adjustment.
Select a deposit route that matches upkeep
Permanent color may add durable depth but creates a stronger chemical and regrowth commitment. Demi-permanent color is often considered for deposit and tonal dimension when major lift is not needed. Direct or semi-permanent formats can add temporary pigment but may stain porous pale hair and fade unevenly.
Read the label for starting-shade limits, gray role, permitted developer or activator, ratio, processing, and refresh directions. Shade codes are not universal. A neutral, gold, copper, ash, or brown designation in one line cannot be assumed to equal another line.
If the main need is tonal shine rather than distinct darker pieces, the hair gloss guide describes that separate all-over or targeted deposit task.
Estimate packets, product, and timing
Count planned pieces by zone and estimate product from length, density, subsection width, and saturation. Porous hair can absorb product quickly, but that does not mean less material is always sufficient. Incomplete saturation can create patchiness while excess product can leak onto hair intended to remain bright.
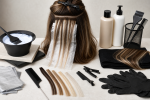
Prepare gloves, nonmetallic bowl and brush if required, foils or approved isolation material, clips, tail comb, timer, protective cape, and towels. Keep original packages and instructions. Protect surfaces and maintain suitable ventilation.
Confirm that the planned packet count fits the product timing. Complex color correction, several formulas, very long dense hair, or a major move darker may be more controlled as a professional service.
Apply without staining the retained highlights
Place each selected section on its support and apply the deposit formula evenly. Keep product within the planned piece and away from neighboring highlights. Fold or isolate consistently. Use enough product for saturation without uncontrolled leakage.
Track application order and protect previously lightened fragile zones. Do not overlap a permanent formula through all lengths simply because the root portion needs depth. If multiple zones require different formulas, professional application may be appropriate.
Follow hair-color safety boundaries
The U.S. Food and Drug Administration hair dye guidance advises following package directions, wearing gloves, completing directed preliminary tests before every use, keeping dye away from the eyes, observing the stated time, and rinsing the scalp well. It warns against using scalp hair dye on eyebrows or eyelashes.
Do not proceed on an irritated, scratched, or sunburned scalp. Keep ingredient information and stop use if a reaction occurs. Obtain appropriate professional guidance; this article does not diagnose reactions or provide medical care.
The American Academy of Dermatology coloring guidance supports conservative shade changes and spacing chemical services. Lowlights avoid additional lift in the selected pieces, but they are still a chemical color service with label and hair-condition boundaries.
Evaluate depth, placement, and tone separately
Rinse and complete after-color steps exactly as directed. Handle wet processed hair gently and dry before assessment. View the normal part, hairline, crown, sides, back, and ends in consistent lighting.
First assess placement: is the retained brightness still visible, are dark pieces distributed intentionally, and did any product bleed? Then assess depth and tone. A good map can still reveal a formula that is too dark or cool on porous hair.
Do not immediately strip or recolor an unsatisfactory dark piece. Preserve the shade, formula, map, packet count, and timing. Professional correction is appropriate for muddy tone, banding, severe over-darkening, fragile hair, or uncertain prior chemistry.
Maintain depth as pigment fades
Lowlights can fade faster or shift tone on porous lightened hair. Track which pieces lose depth first and whether they become warmer, cooler, or more translucent. Maintenance should respond to the observed change, not automatically apply the original permanent formula through every length.
- Save the depth target, warmth decision, map, packet count, and product details.
- Photograph the normal part, face frame, sides, and back.
- Keep regrowth needs separate from porous-length refreshes.
- Strand-test any depositing refresh.
- Use gentle cleansing and conditioning for color-processed hair.
- Limit avoidable high heat and prolonged sun exposure.
Lowlights planning checklist
- Define darkest depth, warmth, contrast, and retained brightness.
- Assess old lightening, porosity, artificial color, and missing warmth.
- Map interior depth, alternating pieces, root connection, and ends.
- Choose weave or slice size, spacing, and start points.
- Test pale, porous, strong, and uncertain-history zones.
- Confirm whether a label-supported filler or professional staged process is needed.
- Count packets and prepare enough product and time.
- Isolate dark pieces from highlights intended to remain bright.
- Follow exact ratio, timing, eye-area, and rinse directions.
- Track fade and refresh lengths separately from regrowth.
Lowlights work best as a controlled depth map. The essential decisions are how dark to go, which warmth supports the canvas, where darker pieces should sit, how much brightness remains, and how porous hair will hold pigment. Representative tests and exact label use are more reliable than a universal darkening formula.
Sources and scope
The FDA source supports label-following, preliminary-test, glove, timing, eye-area, scalp-condition, rinsing, and reaction boundaries. The AAD source supports conservative color-change and service-spacing decisions. Neither source provides one universal lowlight shade, filler, section map, developer, timing, or cosmetic outcome. Use the current instructions for every exact product.