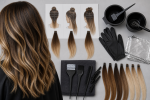
Foil Highlight Placement: Placement, Sectioning, and Upkeep Guide

Direct answer: plan foil highlight placement by deciding where brightness should be visible, how much natural depth should remain, and whether the result should read as fine diffusion, ribbons, a face frame, or broad contrast. Translate that target into a section map before mixing: parting direction, weave or slice size, spacing, foil angle, start and stop points, and total packet count. Complete representative strand tests and follow the exact lightener or color directions. Foil placement controls distribution, but it cannot by itself promise a specific level of lift or tone.
A strong foil plan is visual and countable. Instead of asking for “more highlights,” identify the zones that should look brighter when the hair is worn in its normal part, pulled back, or moved. The same number of foils can create very different results depending on whether they are concentrated around the face, spaced through the crown, or placed underneath for hidden movement.
Choose the visible highlight pattern
Begin with the finished effect, not the foil stack. Common placement goals include:
- Fine diffusion: many narrow weaves that reduce contrast gradually.
- Ribbon dimension: fewer, wider pieces with visible separation from the base.
- Face framing: brightness concentrated near the hairline and front sections.
- Part-line brightness: foils focused where the normal part exposes the roots.
- Interior movement: selected packets below the surface so brightness appears as the hair moves.
- Corrective balance: carefully placed pieces intended to connect existing bands or uneven zones, usually best handled professionally.
View the hair in its usual part and style. Mark the front hairline, both sides of the part, crown movement, temples, and any areas that should remain deeper. The oil slick hair placement guide provides a useful comparison for understanding how visible color depends on the relationship between section map and base.
Decide between weaves and slices
A weave uses the tail of a comb to select alternating small strands from a subsection. Fine weaves can create softer distribution; larger weaves create more visible pieces. A slice places most or all of one thin subsection into the foil, producing a stronger ribbon. Neither is automatically better. The choice must match the intended contrast, hair density, and packet spacing.
Keep subsection thickness separate from selected-strand size. Even a bold slice must be thin enough for controlled saturation and secure foil closure. Overly thick packets can process unevenly, leak, or make it difficult to monitor the hair. Very fine work can also become impractical if the application takes too long for the product’s timing model.
Practice the weave or slice pattern on dry, product-free hair before mixing. Count how many picks fit across each zone and write down the planned rhythm, such as fine weave with one natural subsection left between packets. Avoid switching randomly between patterns unless deliberate variation is part of the design.
Map partings and foil direction
Foil angle influences how the highlight falls. Placement parallel to the normal part can create brightness that follows that line, while diagonal or curved sections can support movement around the head. Hairline sections may need finer work because they are highly visible and often contain shorter hairs. Crown placement should account for growth direction and whorls.
Draw a simple map with four elements:
- The normal part and hairline.
- The zones receiving foils.
- The direction of each row.
- The weave or slice pattern and spacing for that row.
Also mark where foils stop. A partial placement may focus on the top and front, while a fuller pattern extends through sides and back. Leaving intentional depth can improve dimension and reduce the number of sections exposed to lightener.
Use strand tests to set the service boundary
Test sections should represent the darkest, most fragile, previously colored, and most visible zones involved in the plan. One hidden easy strand is not enough when the hair contains old dye, highlights, bands, or varied porosity. Record the exact product, ratio, foil material, subsection thickness, amount applied, start time, check observations allowed by the label, rinse time, dried level, tone, and strand condition.
Lightener exposes underlying warm pigment as it changes depth. The dried test helps answer whether the planned brightness is realistic in one session and whether the hair remains suitable for the proposed placement. For an example of why starting base and fade route matter to a light target, see the light blue hair dye base guide.
If a test strand becomes overly elastic, rough, fragile, or otherwise unsuitable, stop the plan and seek qualified assessment. Do not increase developer, add heat, or extend time beyond the label in order to chase a target swatch.
Estimate foil count, product, and application time
Count planned packets by zone before mixing. A map might allocate a defined number to the face frame, part line, each side, crown, and nape. Packet count is not a quality score; it is a supply and timing tool. Dense hair and fine weaves may require more packets, while a deliberate ribbon pattern may use fewer.
Prepare enough foil or approved highlighting material, color or lightener, gloves, nonmetallic bowl and brush if required, tail combs, clips, timer, protective cape, and clean towels. Product quantity depends on packet number, subsection length, density, and saturation needs. Running short can make later packets drier or less consistent.
Estimate application duration honestly. The first and last packets should not receive uncontrolled differences in exposure. Complex full-head placement, corrective work, long dense hair, or a high-lift target can exceed a reasonable solo home application. A professional service is the more controlled route when timing cannot be managed within the product instructions.
Load and fold foils consistently
Place the foil close enough to support the selected strands without scraping or pressing product onto the scalp. Maintain even tension without pulling. Apply product according to the label, saturating the selected hair while keeping the packet controlled. Avoid overloading, which can cause swelling or leakage, and avoid leaving dry interior strands.
Fold packets consistently so they stay secure and can be monitored as permitted. Keep each row organized in application order. Do not clamp foils with metal tools unless the product instructions and technique specifically support them. Prevent contact between lightener and unselected hair.
Foil is a placement material, not permission to use unapproved heat. Follow the current product’s temperature, checking, and timing instructions. If the manufacturer does not direct external heat, do not add it.
Follow hair-dye and lightening safety boundaries
The U.S. Food and Drug Administration hair dye guidance advises following package directions, wearing gloves, completing directed preliminary tests, keeping dye away from the eyes, observing the stated time, and rinsing the scalp well. It warns against using scalp hair dye on eyebrows or eyelashes. Product warnings differ, so read every component before combining or applying it.
Do not proceed on an irritated, scratched, or sunburned scalp. Keep the workspace ventilated as directed, protect surfaces, and retain package and ingredient information. Stop use if a reaction occurs and obtain appropriate professional guidance. This article does not diagnose reactions or provide medical care.
The American Academy of Dermatology coloring guidance notes that greater lightening generally requires more peroxide and can increase damage. It supports conservative shade changes and spacing chemical services. This is a reason to limit an overambitious foil plan, not a promise that one technique eliminates damage.
Rinse and evaluate the placement map
Remove and rinse foils in the label-directed sequence. Keep product away from the eyes and avoid pulling fragile wet strands. Complete only the after-lightening steps approved for the exact system. Dry the hair before judging the visible pattern.
Evaluate brightness in the normal part, around the face, at the crown, and with the hair moved. Ask whether spacing is regular where intended, whether enough natural depth remains, and whether any leak marks or missed sections follow the foil map. Tone and depth should be assessed separately from placement: a good map can still require a different tonal plan.
Do not immediately re-lighten pieces that look darker. Preserve the map, packet count, timing, and strand-test evidence. Qualified color correction is appropriate for breakage risk, bands, old dark dye, foil bleed, or a target that requires another substantial lift.
Plan regrowth and tonal upkeep
Foil highlights grow out according to their distance from the scalp, contrast with the base, and concentration around visible zones. Fine diffused placement may soften the line, while broad slices can create a more obvious boundary. There is no universal refresh interval. Track the appearance at the part and hairline under similar lighting.
Future services should use the original map to avoid unnecessary overlap onto previously lightened strands. Lengths that need tonal refinement may require a separate gloss or depositing plan; the hair gloss guide explains that different maintenance task. Strand-test any refresh on porous highlighted hair.
- Save the foil map, packet count, weave or slice pattern, and product details.
- Photograph the part, face frame, sides, and back in neutral lighting.
- Keep regrowth placement separate from already lightened lengths.
- Use gentle cleansing and conditioning suitable for color-processed hair.
- Limit avoidable high heat and prolonged sun exposure.
- Seek professional help if overlap cannot be controlled.
Foil highlight placement checklist
- Define diffusion, ribbons, face framing, part brightness, or interior movement.
- Map the normal part, hairline, crown direction, foil rows, and stopping points.
- Choose fine weave, larger weave, slice, or a deliberate combination.
- Test representative dark, fragile, colored, and visible zones.
- Count packets and estimate enough product and application time.
- Use thin controlled subsections and consistent foil loading.
- Follow exact ratio, timing, heat, eye-area, and rinse directions.
- Assess placement, lift, and tone as separate outcomes.
- Save the map for regrowth and avoid unnecessary overlap.
- Escalate major lift, correction, or fragile hair to a qualified colorist.
Foil placement succeeds as a repeatable map, not as an arbitrary stack of packets. A clear visibility goal, consistent weave or slice, controlled subsection, realistic count, representative tests, exact label use, and a future regrowth plan make the result easier to evaluate and maintain.
Sources and scope
The FDA source supports label-following, preliminary-test, glove, timing, eye-area, scalp-condition, rinsing, and reaction boundaries. The AAD source supports conservative lightening and service-spacing decisions. Neither source supplies one universal foil pattern, developer, packet count, processing time, or cosmetic outcome. Use the current directions for every exact product involved.