Gray-Blending Color Placement: Placement, Sectioning, and Upkeep Guide

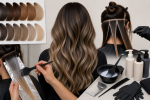
Direct answer: gray blending reduces the visual boundary between naturally gray hair and pigmented hair without necessarily covering every gray strand. Plan it by mapping gray density around the hairline, part, crown, sides, and nape; choosing how transparent the result should remain; placing highlights, lowlights, or deposit only where they connect the two color populations; and testing each materially different zone before a full service.
Gray blending is a transition strategy, not one formula. One person may want bright gray preserved with a few cool lowlights. Another may want dark hair softened with fine highlights around scattered gray. A third may want a demi-permanent deposit that reduces contrast while allowing gray to remain visible. The right map depends on distribution, not just the total percentage of gray.
Choose blending instead of full coverage deliberately
Define the acceptance target. Full coverage seeks a more uniform pigmented result and usually creates a clearer regrowth line. Blending allows some gray to remain visible and aims for a softer transition as roots grow. Decide whether the priority is lower contrast, preserved brightness, less obvious regrowth, a cooler or warmer finish, or reduced frequency of all-over deposit.
Use photographs to describe transparency: high transparency keeps most gray visible, medium transparency visually mixes gray and pigmented strands, and low transparency approaches coverage. These terms are more useful than asking for gray blending without stating how much gray should still be seen.
Build a gray-density map
Examine dry hair in indirect daylight and indoor light. Divide the head into hairline, temples, usual part, crown, sides, interior, and nape. Record gray density as sparse, mixed, concentrated, or nearly continuous in each zone. Also note whether the gray strands are bright white, silver, salt-and-pepper, warm, coarse, fine, resistant, or more porous than the pigmented hair.
Gray often clusters rather than distributing evenly. A bright front streak may need preservation while the crown needs fine connection pieces. Dense gray at the temples can respond differently from darker nape hair. Mapping prevents a uniform formula and uniform section size from producing an uneven visual result.
The site’s gray hair transition guide expands on natural-growth boundaries, old-color removal limits, tone decisions, and care while the proportion of gray changes.
Select the blending mechanism by zone
Highlights can connect dark pigmented hair to bright gray by adding lighter strands. Lowlights can add selected depth through an area that feels uniformly pale. Demi-permanent deposit or a gloss can soften contrast while leaving some natural variation. A root shadow can reduce a sharp line only when its depth, transparency, and grow-out direction fit the density map.
These mechanisms are not interchangeable. Highlights change lightness and expose underlying warmth. Lowlights add pigment that may release differently from natural dark strands. Deposit can read darker on porous ends than on resistant gray. Choose one job for each zone and avoid layering every mechanism across the full head by default.
Choose section density from gray distribution
Use finer, closer sections where gray and pigmented strands need a gradual bridge. Use fewer or wider sections only when the target calls for visible ribbons. At a concentrated gray hairline, overloading dark lowlights can create a striped edge. In a dark interior with sparse gray, too many highlights can make the entire result lighter than intended.
Follow growth direction and the usual part. Sections placed only for a salon photograph may reveal hard lines when the part changes or hair is gathered. Release each mapped area and inspect it loose, tucked, and pulled back before committing to the pattern.
Coordinate depth and undertone
Gray reflects surrounding color and lighting. A very cool lowlight beside bright white can increase contrast, while a soft neutral may create a quieter bridge. Warm highlights can look golden against silver. Cool deposit can appear violet, blue, or flat on very pale porous strands if it is too strong. There is no universal ash requirement for gray blending.
Compare candidate shades within one product line and read the intended starting level, developer or activator, ratio, timing, and gray-related directions. The AGEbeautiful shade-selection guide explains how to use a manufacturer’s chart as one system rather than treating shade numbers as universal across brands.
Strand-test resistant and porous zones
Test a representative gray hairline or temple section and a separate mid-length or end when their texture and history differ. Record product, shade, ratio, section thickness, saturation, timing, rinse method, and fully dry result. Evaluate transparency, undertone, depth, coverage distribution, and whether the transition is softer in the intended viewing angles.
A resistant gray strand may take less deposit than surrounding pigmented hair. A porous white end may absorb too much cool pigment. A single hidden test from the nape does not represent a bright resistant hairline. Use the density map to choose evidence that matches the actual zones.
Plan the application order around resistance
If the chosen product label and strand tests support different start times, write the sequence before mixing. Isolate highlights or lowlights with supported barriers, protect gray intended to remain untouched, and keep deposit away from pale ends that do not need it. Prepare enough product for complete saturation in the zones where deposit is intended.
Do not extend processing beyond the label to force resistant gray. Do not assume repeated overlap will create a better blend. Reassess after the dry result and revise the future section map rather than stacking unnecessary color on all lengths.
Design regrowth as part of the result
Gray blending should anticipate new growth. A dense hairline can become visible sooner than a mixed crown. Highlights may leave a softer root transition but can expose warmth over time. Lowlights can fade from previously lightened hair. Deposit may release unevenly between resistant roots and porous ends.
Separate root blending, highlight or lowlight replacement, tone refinement, and haircut maintenance. A root visit may need only selected zones. A gloss may refine tone without changing placement when the canvas supports it. The hair gloss guide provides decision checks for deposit, tone, shine, and realistic washout.
Protect the evolving gray pattern
Use a cleansing and conditioning routine that fits the scalp, texture, and color system. Reduce unnecessary high heat and use heat protection according to its label. Pigmented shampoos or masks can shift white and porous sections quickly, so test a small area and track frequency instead of assuming more cool pigment creates a more natural gray.
Photograph the same views after each service and at several stages of regrowth. This shows whether the blend is becoming softer, more contrasted, too light, too dark, or too cool. A repeatable record is more useful than comparing the result with images made under different lighting.
Follow safety and claim boundaries
Follow the current product label and enclosed directions, including preliminary test instructions, gloves, timing, rinsing, and restrictions. The FDA hair-dye guidance notes that reactions can occur even after earlier uneventful use and warns against using scalp hair dye on eyebrows or eyelashes. Do not apply over an irritated or damaged scalp.
The American Academy of Dermatology coloring guidance recommends conservative color changes and following manufacturer testing directions. These sources establish precautions, not a universal gray-coverage formula or an assured blending result. A qualified professional can assess extensive old-color bands, fragile hair, or a complex transition involving several incompatible histories.
Gray-blending checklist
- Choose the desired transparency instead of assuming full coverage.
- Map gray density at the hairline, part, crown, sides, interior, and nape.
- Record texture, resistance, porosity, previous color, and visible undertone.
- Assign highlights, lowlights, deposit, or no color to specific zones.
- Match section density and direction to the gray distribution and usual styling.
- Test resistant roots and porous lengths separately when they differ.
- Plan root, placement, tone, and haircut upkeep as separate decisions.
- Photograph the same views through regrowth to evaluate the actual transition.
A useful gray blend keeps the natural distribution legible while reducing abrupt boundaries. The result becomes easier to repeat when density, transparency, section pattern, and regrowth are documented as separate variables rather than compressed into one gray percentage.