Hair Chalk: Finish, Transfer, Fade, and Removal Guide

Direct answer: hair chalk creates temporary surface color by transferring dry or lightly bound pigment onto selected strands. Choose a format and shade suited to the starting base, isolate a small section, apply only the friction or moisture directed by the label, control loose powder, and check the fully finished strand for transfer. Brushing may remove loose residue, while complete removal can require the stated shampoo process.
The key distinction is physical deposit. Chalk does not permanently lighten the base, and a vivid block in the package does not predict an identical dry result on every hair color or texture.
Identify the chalk format
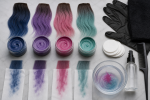
Common formats include a solid stick, compact or palette pan, clamshell applicator, comb applicator, and a creamier chalk-like block. Each changes contact area and powder release. Read whether the product calls for dry or damp hair, gloves, sealing, brushing, or shampoo.
Do not transfer instructions between formats. A method that releases pigment from a hard stick may overload a soft compact or damage hair in a tight clamshell.
Map the starting base and desired placement
Record base depth, undertone, porosity, texture, prior color, and condition. Light strands often show bright pigment with less material; dark strands may show a muted tint, reflection, or no useful contrast. Hair chalk cannot make a dark base chemically lighter.
Choose tips, a single streak, a hidden panel, selected curls, or another limited pattern before applying. For light-blue inspiration and base-color context, see the light blue hair guide, while remembering that chalk remains a different format.
Prepare for dry pigment
Work in a ventilated area without directing a fan across the product. Protect the floor and clothing, especially when using saturated red, blue, violet, or green shades. Keep powder away from eyes, mouth, and breathing zones. Use gloves and a cape when directed.
Arrange clips, an expendable towel, the approved applicator, and cleanup materials before opening the chalk. Do not use food utensils or a brush that will return to ordinary grooming without proper cleaning.
Run a representative strand test
Complete any package-required warning or skin check first. Select a hidden strand with the same base and texture as the intended placement. Apply the minimum directed passes, finish the section as instructed, and wait until it reaches the stated dry endpoint.
Evaluate color, drag, roughness, tangling, powder release, fabric transfer, brushing, and washout. A wet or freshly rubbed section is not the final result.
Control friction during application
Support the strand so pulling force is not concentrated at the root. Move the chalk in the direction specified by the product, using short controlled passes. Avoid repeated sawing motion over the same area; more friction can increase dryness, breakage risk, uneven deposit, and loose dust.
If the format sandwiches hair between surfaces, use a small section that moves without snagging. If it is a palette, load the applicator lightly rather than digging into the pan.
Use moisture only when directed
Some chalk directions call for dry hair; others permit or require slight dampness. Added water can deepen initial deposit but also spread color, increase transfer while drying, change texture, and mark nearby clothing.
Do not mist the product or strand by habit. Follow the exact instruction and allow the section to dry before it contacts other hair or fabric.
Build visibility without making a powder shell
Inspect after each pass. On dark hair, adding more material may eventually increase residue without producing a brighter shade. Stop when another pass worsens feel or shedding more than it improves visibility.
Preserve some strand separation. A thick, opaque coating can look flat and can release more dust. The direct-color guide explains why a liquid deposit product should not be used as the performance standard for dry chalk.
Finish the strand according to the label
Some formulas may direct gentle brushing, styling, or a compatible setting step; others do not. Never add hairspray, oil, heat, or another sealant unless the chalk directions allow that combination. Extra product can change shade, stiffness, transfer, and removal.
Let the section settle, then inspect in indoor and natural light. Look for even placement, powder clouds, crumbs, harsh borders, altered curl shape, and residue on adjacent hair.
Test transfer before wearing the style
Press a clean white tissue lightly against a hidden area, then release it. For styles touching clothing, perform a gentle contact check against an expendable pale cloth. Do not rub aggressively, because that tests abrasion rather than normal contact.
Loose pigment can mark collars, scarves, hats, pillowcases, car headrests, and towels. Friction, sweat, rain, humidity, oil, and repeated touching can change transfer during wear.
Understand fade as physical wear
Chalk can become less visible as loose pigment falls, transfers, brushes away, or is washed. This is not the same pathway as an oxidative dye growing out or a direct dye gradually releasing from hair.
Track where color is going. A lighter strand paired with a marked collar indicates transfer, not clean disappearance. Avoid repeatedly adding powder without checking buildup and fabric contact.
Remove loose chalk before washing if directed
If the label instructs brushing first, use a clean suitable tool and work gently from the ends upward while containing fallout over a washable surface. Brushing may remove loose material but should not be assumed to complete removal.
Do not create airborne dust by shaking hair or using forced air. Clean the surrounding surface with a method appropriate for the material.
Shampoo out remaining pigment
Follow the stated wash sequence. Wet hair as directed, distribute shampoo through colored sections without aggressive scratching, and rinse while protecting the eyes. Repeat only when instructions and hair condition allow. Check inner strands and rinse water before using a light towel.
Do not use household solvents, bleach mixtures, or oxidative color remover on chalk residue. If the maker’s process does not remove it as expected, pause and seek formula-specific guidance.
Check hair condition after removal
When hair is clean and dry, compare smoothness, movement, tangling, and breakage with the baseline. Use only a compatible conditioning process. Reduce frequency or friction if repeated chalk use leaves the section harder to manage.
For broader red placement ideas, the red hair color ideas page can help define a visual target without implying that chalk will reproduce permanent-color depth.
Hair chalk mistakes to avoid
- Assuming package color overrides the starting base.
- Using instructions from a different chalk format.
- Applying large sections that snag in the tool.
- Adding water, heat, oil, or spray without label support.
- Repeating high-friction passes for brightness.
- Judging transfer before the strand settles.
- Confusing pigment on fabric with harmless fade.
- Using harsh dye-removal chemistry on dry residue.
Hair chalk workflow
- Identify stick, palette, clamp, comb, or cream format.
- Read hair-condition, moisture, warning, and removal directions.
- Record base color, texture, prior color, and condition.
- Protect surfaces and prepare dust-control materials.
- Test a representative hidden strand.
- Apply controlled passes with supported hair.
- Stop before residue and drag outweigh visibility.
- Finish and dry only by the stated method.
- Check tissue and fabric transfer.
- Brush and shampoo only as directed, then reassess condition.
Sources and scope
The FDA hair dye guidance supports following directions, completing instructed skin checks, using gloves, protecting the eyes, and avoiding irritated scalp conditions for products that function as hair color. The American Academy of Dermatology hair coloring guidance supports cautious label-led use and attention to hair condition. Neither source endorses hair chalk or guarantees brightness, transfer resistance, wear duration, brushing, shampoo removal, or hair compatibility.