Half-and-Half Hair Color: Placement, Sectioning, and Upkeep Guide

Direct answer: half-and-half hair color divides the visible hair into two large color fields, usually at the center part but sometimes on a diagonal, side part, or front-versus-back axis. Plan it by defining the split on dry hair, deciding whether the fields should be equal, auditing and testing each side as a separate canvas, preventing formulas from crossing the boundary, and maintaining roots, tone, and condition independently.
The defining feature is the border between the fields. Two attractive shades can still produce an unclear result if the division wanders, ignores the haircut, or disappears in the usual part. Handle the border as a design line and both sides as related but separate color services.
Choose the split line from the finished view
Photograph the hair in its normal part, natural texture, tucked position, and common gathered styles. Mark the line that should divide the colors in those views. A center scalp part creates an obvious bilateral split, while a diagonal division can shift as the hair moves. A front-versus-back division may be dramatic in profile but less visible head-on.
Decide whether the line should continue through bangs, face-framing layers, crown, and nape. Short layers can cross the border after styling. Map where each section lands when dry rather than assuming a straight scalp line produces a straight visible edge.
Decide equal halves or deliberate imbalance
An exact fifty-fifty result requires a measured division at the scalp and comparable visible mass on both sides. Hair density, a side part, undercut, or asymmetric cut can make equal scalp sections look unequal. If one color should dominate, record the intended visible ratio instead of describing it loosely as half-and-half.
Check the ratio from the front, back, and both profiles. Preserve enough of each field that the design remains readable after ordinary movement. Use section photographs and landmarks around the hairline, ears, crown, and nape so later maintenance can reconstruct the same geometry.
Audit each side as a different canvas
Record natural level, permanent color, direct dye, previous lightening, exposed undertone, gray distribution, porosity, elasticity, and breakage on each side. Even hair that looks uniform can have different history at the face, part, middle, and ends. One side may support a pale or vivid target while the other requires a darker plan.
Do not use the stronger side to justify processing the weaker side. Pale ends may need isolation, and old dark color can create bands. If the two targets require very different lightness, confirm that both canvases can reach a compatible depth without excessive overlap.
Test both target fields
Strand-test a representative section from each field. Add separate tests for roots, bands, or porous ends when they differ. Record product, ratio, developer or activator, section thickness, saturation, timing, insulation, rinse method, and fully dry result.
Judge lift, undertone, deposit, transfer, elasticity, and fade. Place the dry tests beside each other to assess contrast and harmony. The target is not merely two successful swatches; it is a pair that remains distinct and visually related on the actual canvases.
Build a boundary-control setup
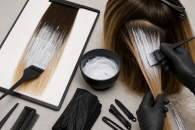
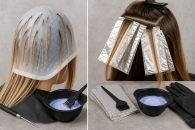
Prepare gloves, separate bowls and brushes, clips, a tail comb, barriers supported by the product directions, towels, and separate timers. Assign tools to each side or clean them completely before reuse. Clip the inactive field away and protect the border from drips or accidental brush contact.
Start with clean, reproducible sections. Apply enough product for complete saturation within each field without flooding the part line. Follow every current label for mixture, use area, processing, and rinsing. Do not improvise cross-product combinations simply because the two colors are used in one design.
Coordinate different processing clocks
The fields may not process at the same rate. Use test results to establish application order and separate clocks. A resistant dark side may begin earlier, while porous pale lengths may need later or shorter deposit. Do not keep a completed side processing beyond its directions while waiting for the other.
Protect previously light ends from repeated overlap. If one field needs lightening and the other only needs deposit, isolate those operations clearly. Dry both fields before judging depth or border quality because wet hair can conceal warmth and make the split look less distinct.
Plan a rinse that preserves the border
Direct dyes and deep deposits can transfer into a pale neighboring field. Follow product directions and plan which side is rinsed first, how the other side is isolated, and how runoff is controlled. Use protected towels and avoid letting saturated lengths lie across the opposite field.
Water temperature alone does not determine transfer. Pigment type, saturation, porosity, rinse duration, and physical contact matter. Photograph the dry border after the first service and after early washes so migration can be distinguished from ordinary fade.
Coordinate shades without erasing contrast
Compare depth, undertone, and saturation as a pair. Black and pale blonde create a high-value contrast; copper and deep brown create a warmer, lower-contrast split; two vivid colors add transfer and fade interactions. The red hair color ideas guide can help frame warm-side undertone and fade decisions.
For a multitone dark-field option, the oil slick hair guide discusses dark-canvas visibility and neighboring shades. Use a shade chart as a comparison tool, not a promise that the hair will match a printed or screen sample; the hair color chart guide explains the limits of level and tone references.
Maintain roots, color, and condition separately
Root growth appears along the border and throughout both fields. Re-establish the original split before applying a root formula. Refresh only the changed area: roots when the lengths remain suitable, one faded field when the other is stable, or condition-focused care when chemical work should wait.
Track root gap, border position, tonal shift, transfer, and condition for each side. Haircut changes can move layers across the division, so reassess geometry after a significant trim. Keep the original map, section photographs, formulas, test notes, and dry-result images available.
Follow hair-color safety boundaries
Follow each label and enclosed instruction, including preliminary test directions, gloves, timing, rinsing, and restrictions. The FDA hair-dye guidance notes that reactions can occur after earlier uneventful use and that scalp hair dye is not intended for eyebrows or eyelashes. Avoid applying color over irritated or damaged scalp skin.
The American Academy of Dermatology coloring guidance recommends conservative shade changes and following manufacturer testing directions. These sources establish precautions, not one split-color formula or an assured outcome. Major lightening, severe bands, old dark dye, or fragile hair is a reason to seek qualified professional assessment.
Half-and-half planning checklist
- Draw the dry visible split through the part, bangs, crown, and nape.
- Record the intended visible ratio from four views.
- Audit previous color, level, undertone, porosity, and condition on each side.
- Test every materially different canvas and compare the dry results together.
- Use separate tools, barriers, clocks, and rinse control.
- Protect pale or previously lightened ends from overlap.
- Document the border before and after early washes.
- Maintain roots, each color field, transfer, and condition independently.
A controlled half-and-half result comes from a stable border and two evidence-based color plans. Dry-view mapping, side-specific tests, physical isolation, and a recorded maintenance map keep the design recognizable as roots grow and pigments fade.