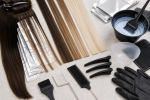
Money Piece Highlights: Placement, Sectioning, and Upkeep Guide

Direct answer: a money piece is a deliberately prominent highlight panel placed at each side of the front hairline. Plan it by choosing panel width, symmetry, root distance, contrast with the base, and how the pieces should fall with the normal part. Test both the darkest and most fragile front strands, isolate the panels cleanly, and follow the exact product directions. Because the placement is concentrated and highly visible, a small sectioning or tone error can dominate the finished look.
A money piece is narrower in scope than a complete face-framing pattern. It may connect to other highlights, but its defining task is the high-contrast front panel. The plan should answer exactly how much hair enters each side and where the brightness begins.
Choose subtle, medium, or graphic contrast
Compare the target panel with the natural or colored base. A subtle money piece may sit only a few shades lighter and use a fine weave. A medium version may use a wider slice or several close foils. A graphic panel can create strong light-dark separation and requires even more attention to starting level, warmth, and grow-out.
Write down:
- Desired width at the hairline.
- Whether both sides should match exactly.
- How close brightness begins to the scalp.
- Target depth and tone.
- Whether the panel connects to side or top highlights.
- How much natural depth remains behind it.
If the target is warm red or copper rather than pale blonde, the red hair color ideas guide helps compare base and visible warmth without implying one universal formula.
Map the normal part and front hairline
View dry hair in its usual part. Identify the exact strands that fall forward on each side, the temple recession, shorter hairs, cowlicks, and any asymmetry. A perfectly equal geometric section may not look equal after the hair falls, so map visible weight rather than relying only on ruler measurements.
Separate the front panel from hair behind it. Decide whether the section is triangular, rectangular, curved, woven, or sliced. Keep the selected area controlled; accidentally extending too far back can turn a focused money piece into a broad face frame.
Photograph both sides before mixing and record section boundaries. The high-visibility position makes this map valuable for future regrowth work.
Assess starting canvas and prior lightening
Record natural depth, permanent dye, old highlights, porosity, strand thickness, and fragile hairs around the temples. Front hair can be finer and may have repeated overlap from earlier services. Dark artificial color can resist lightening or reveal uneven warmth.
A pale inspiration image may require more than one session. The light blue hair dye base guide provides context for why a very light target depends on the starting canvas and realistic lift.
Do not assume a small section can tolerate stronger chemistry. Concentrated exposure on a visible fragile panel can create breakage that is difficult to disguise.
Test each side when the history differs
Test a representative strand from the left and right when density, old color, or condition is not identical. Reproduce the intended section size, product, ratio, foil or support, saturation, timing, rinse, and after-color steps allowed by the label.
After drying, compare achieved depth, warmth, tone, texture, and symmetry. The test can reveal that one side needs a different professional plan or that the target contrast is too ambitious for one session.
Stop if a strand becomes overly elastic, rough, fragile, or otherwise unsuitable. Do not increase developer, add unapproved heat, or exceed timing to make both sides match.
Select panel width and internal pattern
A narrow weave creates a soft edge. A clean slice produces stronger contrast. Several small foils can build width while preserving small amounts of natural depth. Choose one internal pattern deliberately rather than mixing methods without a reason.
Keep subsections thin enough for even saturation and secure isolation. Mark the root distance and whether the panel begins with a fine weave near the scalp before becoming more solid through the lengths.
For layered or curly hair, assess the panel in its natural fall. A wide straight section can break into multiple visible pieces when the hair bends or separates.
Protect the hairline and prevent leakage
Place foils or approved support securely without pulling short hairs. Keep product off the skin and away from the eyes. Saturate selected strands evenly without overloading the packet. Bleed at the front hairline is especially visible.
Map previously lightened areas and avoid unnecessary overlap. If the money piece already contains pale ends, fresh product may belong only on new growth or a controlled transition zone according to the professional or label-directed plan.
Do not use unapproved heat or improvised barrier chemicals. Follow the exact support, ratio, and timing instructions for the product.
Prepare supplies and a precise timing plan
A small panel uses fewer packets than a full highlight service, but the preparation standard remains the same. Have enough product, foils or support material, gloves, nonmetallic bowl and brush if required, clips, tail comb, timer, cape, and towels ready.
Plan left and right application order so exposure remains comparable. If one side has a different starting canvas, identical clock time may not create identical results; this is a reason for test evidence and professional judgment, not an invitation to exceed directions.
Protect counters, floors, clothing, and nearby surfaces. Maintain suitable ventilation and keep every package and ingredient list available.
Follow hair-color safety boundaries
The U.S. Food and Drug Administration hair dye guidance advises following package directions, wearing gloves, completing directed preliminary tests, keeping dye away from the eyes, observing stated time, and rinsing the scalp well. It warns against using scalp hair dye on eyebrows or eyelashes.
Do not proceed on an irritated, scratched, or sunburned scalp. Stop use if a reaction occurs and obtain appropriate professional guidance. This article does not diagnose reactions or provide medical care.
The American Academy of Dermatology coloring guidance notes that greater lightening generally requires more peroxide and can increase damage. A small front panel does not remove that boundary.
Evaluate width, symmetry, lift, and tone separately
Rinse and complete after-lightening steps as directed. Handle the front strands gently and dry before assessment. View the panel with the center and side parts normally worn, hair forward, hair tucked back, and hair tied away from the face.
First assess placement: panel width, root distance, visible symmetry, and connection to the rest of the color. Then assess depth and tone. A symmetrical section can still process differently on each side.
Do not immediately re-lighten a darker side. Save the section map, product, timing, and test notes. Professional correction is appropriate for leakage, severe asymmetry, fragile hair, old dark color, or another major lift.
Plan high-visibility regrowth and tonal upkeep
Money piece regrowth is often visible early because the contrast sits at the front hairline. There is no universal refresh calendar. Track root distance and tone in comparable lighting and decide when the panel no longer meets the intended look.
Future lightening should follow the original boundaries and protect pale lengths from overlap. Tonal fade may need a separate depositing service rather than new lightener; compare that task with the hair gloss guide.
- Save left and right section maps, width, root distance, and product details.
- Photograph the normal part and both side views.
- Keep new-growth application separate from pale lengths.
- Use gentle cleansing and conditioning for color-processed hair.
- Limit avoidable high heat and prolonged sun exposure.
- Strand-test any tonal refresh on porous front pieces.
Money piece planning checklist
- Choose subtle, medium, or graphic contrast.
- Map visible panel width on both sides of the normal part.
- Assess fine hairline strands, old color, porosity, and overlap.
- Test left and right when their histories differ.
- Choose weave, slice, or a controlled multi-foil panel.
- Mark root distance and transition into pale lengths.
- Apply enough product without skin contact or leakage.
- Follow exact ratio, heat, timing, eye-area, and rinse directions.
- Evaluate placement, symmetry, lift, and tone separately.
- Reuse the map for frequent visible regrowth maintenance.
A money piece works as a focused design decision. Exact front-panel boundaries, realistic contrast, side-specific tests, controlled saturation, and a recorded regrowth map matter more than copying a generic bright-face photograph.
Sources and scope
The FDA source supports label-following, preliminary-test, glove, timing, eye-area, scalp-condition, rinsing, and reaction boundaries. The AAD source supports conservative lightening and service-spacing decisions. Neither source supplies one universal money-piece width, shade, developer, processing time, or cosmetic outcome. Use the current instructions for every exact product.