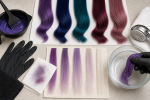
Pigment-Depositing Hair Masks: Finish, Transfer, Fade, and Removal Guide

Direct answer: choose a pigment-depositing hair mask by starting base, desired tonal strength, product thickness, and the amount of section-by-section control you can maintain. Masks are commonly applied as a deliberate periodic session rather than an automatic step at every wash. Follow the label’s wetness level, amount, timing, and rinse directions; wear gloves and use a hidden strand first. A thick mask can make saturation easier to see, but it can also overload porous ends or leave uneven bands if sections are too large.
The useful distinction from a color-depositing conditioner is workflow: mask texture, section thickness, dwell period, and zone control deserve separate planning even when both use direct pigment.
Choose the mask goal before the shade
Decide whether the session is intended to reinforce an existing shade, create a visible temporary shift, mute unwanted warmth, or add creative color to lightened pieces. A refresh and a major shift require different pigment strength and base conditions.
Read what the label says the product is designed to do. Do not infer repair, bond rebuilding, or reversal of damage solely from the word mask or from a thick texture.
The direct color guide explains base dependence and fade behavior that also matter for a depositing mask.
Map base color and porosity by zone
Examine roots, mid-lengths, ends, highlights, gray strands, and previously lightened panels in dry neutral light. Pale porous hair can show pigment strongly. Dark natural hair may show only a reflected tone.
Old bleach, heat damage, repeated direct color, and uneven permanent dye can create zones that absorb at different rates. A thick mask does not equalize those differences automatically.
Record the lightest and most porous zone because it often sets the safe upper limit for timing and frequency within the product directions.
Evaluate texture and spread
A mask should spread through the intended section without running immediately down the neck. Very dense texture may need smaller sections and more careful distribution. A thin mask may move easily but can drip or leave the underside of dense hair unsaturated.
Use only the application tool allowed by the directions. A tint brush offers boundary control, while gloved hands may distribute through lengths when permitted. A wide-tooth comb can help only if the label allows it and hair can be detangled without force.
Do not add water, conditioner, oil, developer, or another color unless the manufacturer explicitly directs that combination.
Use a hidden strand for strength and timing
Complete any label-required skin check before use. Select a hidden strand that includes the lightest or most porous area and apply the exact planned layer thickness and timing.
Rinse, dry, and evaluate the strand under neutral light. Check depth, hue, patchiness, surface feel, transfer, and whether the strand became darker than the target.
A satisfactory mid-length result does not prove that pale ends will respond the same way. Include both zones when possible.
Prepare a section-by-section application map
Divide hair into quadrants or smaller zones before opening the mask. Plan where application starts, which areas receive shorter exposure, and which previously colored sections should be avoided if the directions permit selective use.
Wear gloves, protect clothing and surfaces, and keep a timer visible. Use clips that do not drag active pigment into clean sections.
The at-home color application guide connects section control with label timing, strand checks, and safety boundaries.
Saturate thin sections without piling on excess
Apply enough mask to coat each intended strand evenly, then inspect the underside. A glossy surface on the top layer does not show whether the center is covered.
Keep section thickness consistent. Repeatedly adding product to already coated ends can increase buildup without improving root or mid-length coverage.
Do not massage pigment onto the scalp unless the label directs scalp application. Keep the product away from eyes and use controlled pressure around ears and hairline.
Control the dwell period
Start the timer at the point directed by the product. Do not count setup delays casually or extend the stated maximum because a dark mask appears weak on wet hair.
Cover hair only if the instructions call for a cap. Added heat, a tight wrap, or a household plastic bag can change the use conditions and should not be improvised.
Use the waiting period to inspect drips and clean the workspace, not to add more pigment at random.
Rinse for the labeled endpoint
Follow water temperature and cleanser directions. Support long hair so pigment does not drag across uncolored areas during rinse. Keep runoff away from eyes and clean shower surfaces promptly.
Colored water can continue after enough loose product has left the hair. Conversely, clearer water does not prove that all transferable pigment is gone. Use the product’s stated endpoint.
Judge finish only after full drying
Inspect depth, tone, shine, strand separation, and evenness in dry hair. Dense wet sections can hide missed areas, while surface residue can make hair appear darker.
Compare the result with the hidden strand and initial base map. Note whether porous ends became stronger, roots remained unchanged, or highlighted pieces turned a different hue.
The light blue hair color guide illustrates why very pale targets demand a clean base and careful fade planning.
Manage transfer after a mask session
Vivid and dark pigments can transfer from damp hair to towels, collars, pillowcases, hands, grout, and counters. Dry hair fully and choose fabrics that can tolerate possible transfer.
Transfer varies by product, shade, amount, rinse, and porosity. Do not assume a thick mask transfers more or less than a conditioner without product-specific evidence.
Track fade by zone
Record each wash under similar light. Warm pigments may reveal gold or orange. Cool blue and violet can expose green, teal, beige, or yellow depending on the base. Porous ends can retain one component while other zones release it.
A single heavy session may fade differently from several lighter sessions. Avoid scheduling the next application before observing the current result.
Correct uneven buildup cautiously
Pause pigment when ends become too dark or dull. Apply no opposite color blindly because complementary pigment can create muddy bands.
Use a hidden strand before stronger cleansing or a dedicated removal product. Repeated aggressive washing can increase dryness without removing pigment evenly.
Set realistic removal expectations
A depositing mask may be described as temporary, but no fixed wash count applies to every head. Lightened porous hair can retain pink, blue, violet, green, or red traces.
Allow time before an important color change. Seek professional assessment for fragile hair, strong residual pigment, multiple bands, or a move to very blonde or an opposite creative hue.
Clean and store the mask correctly
Close the original container with clean dry hands and keep its directions available. Do not return removed product to the jar or decant it into an unlabeled tub.
Wash bowls, brushes, combs, clips, gloves, and surfaces promptly. Dry reusable tools fully and keep them separate from food utensils.
Safety boundaries
The U.S. Food and Drug Administration advises following hair-dye directions, completing the directed skin check before every use, wearing gloves, keeping dye away from the eyes, observing timing, and rinsing the scalp well. Do not use scalp hair color on eyebrows or eyelashes.
Do not proceed on an irritated or damaged scalp. A mask format does not establish universal suitability or make warnings optional.
Common mask mistakes
- Assuming thick texture creates even saturation.
- Using sections too large to inspect underneath.
- Applying the same amount to resistant roots and porous ends.
- Adding heat or a cap without directions.
- Extending time based on wet appearance.
- Judging the finish before hair dries.
- Scheduling another session before tracking fade.
- Expecting removal within a fixed wash count.
Final mask checklist
- Define refresh, shift, neutralization, or creative intent.
- Map base and porosity by zone.
- Read texture, tool, amount, and timing directions.
- Complete required skin and hidden-strand checks.
- Section first and saturate thinly and consistently.
- Rinse and evaluate only at the labeled endpoint.
- Track dry finish, transfer, and zone-specific fade.
- Use a strand-first removal or future-color plan.
Sources and scope
The FDA hair dyes guidance supports the label, skin-check, glove, timing, eye-area, rinse, and scalp-condition boundaries. The American Academy of Dermatology coloring guidance supports conservative changes and damage-reduction limits. Neither source endorses a depositing mask, texture, shade, timing, duration, removal route, or result.