Balayage Placement: Placement, Sectioning, and Upkeep Guide

Direct answer: plan balayage by deciding where brightness should begin, which surfaces should catch light, and how much natural depth should remain between painted pieces. Map the normal part, hairline, crown movement, mids, and ends before mixing. Use controlled subsections, paint a deliberate gradient rather than coating every strand, and complete representative strand tests with the exact lightener or color system. Balayage describes a placement approach; it does not promise one level of lift, tone, or maintenance schedule.
The defining decision is not simply “freehand versus foil.” It is how brightness moves through the haircut. A soft balayage may preserve a deeper root and place lightness on selected surfaces, while a high-contrast version may use broader ribbons and heavier end saturation. The plan should still be countable and repeatable even when the edges look organic.
Write the brightness map before choosing sections
View dry hair in its usual part and style. Mark the face frame, top surface, crown, sides, interior, and ends. Decide which zones should be brightest and which should remain deep. Also note growth direction, layers, density, curl pattern, and how the hair moves when tied back.
Common placement goals include:
- Soft sunlit surface: fine painted pieces on the top and front with substantial natural depth.
- Face-focused brightness: stronger lightness around the hairline with quieter interior pieces.
- Dimensional ribbons: wider selected sections separated by visible base color.
- Bright ends: a gradual increase in saturation toward the lower lengths.
- Corrective connection: selected painting intended to connect old bands or highlights, usually requiring professional assessment.
For another example of placement-driven visibility, see the oil slick hair placement guide. The colors differ, but the useful planning question is the same: which surfaces reveal the design in normal movement?
Separate starting canvas from target inspiration
Assess natural depth, artificial color, highlights, porosity, texture, and fragile zones. Balayage painted over untreated medium-brown hair is not the same job as painting over dark permanent dye or previously lightened ends. Old artificial pigment may resist lightening or expose uneven warmth. Porous ends may change faster than stronger mid-lengths.
Translate the inspiration image into measurable features: starting depth at the root, first visible point of brightness, width of ribbons, amount of natural depth, lightest end zone, and overall warmth or coolness. Do not assume a shade name or photograph predicts the result on a different canvas.
If the target is very pale or vivid, the light blue hair dye base guide explains why starting level and realistic lightening boundaries matter before depositing a light color.
Use representative strand tests
Test more than one zone when the history varies. Include a dark interior strand, a visible front strand, a previously colored section, and a porous end if those areas are part of the map. Use the exact product, ratio, subsection, painting pattern, support material, timing, and rinse process allowed by the label.
After drying, record:
- The achieved depth and exposed warmth.
- The transition from unpainted root to painted mid-length.
- Whether the end can support the planned saturation.
- Whether the strand remains suitable for the larger service.
- Whether the target requires more than one session.
A strand test is evidence for planning, not permission to exceed the instructions. If the strand becomes overly elastic, rough, fragile, or otherwise unsuitable, stop and seek qualified assessment. Do not increase developer, add unapproved heat, or extend processing beyond the label to chase a lighter photograph.
Choose section shape and surface orientation
Balayage sections may be diagonal, horizontal, curved, or adapted to the haircut. The important point is to place brightness on the surface that will be visible when the hair falls naturally. A diagonal section can create movement; a horizontal section can create a broader band; a curved section can follow the head shape. These are design choices, not universal rules.
Keep subsections thin enough to control product and observe the transition. Very thick sections can leave the interior unaffected while producing an abrupt painted surface. That may be intentional for strong ribbons, but it should be planned. Fine sections create softer diffusion but increase application time.
Mark where each piece begins, where saturation increases, and whether the ends are fully painted or selectively left deep. Use a repeatable spacing rhythm so the finished result does not become randomly dense on one side.
Build a soft transition without uncontrolled overlap
The transition zone should be deliberate. Use the brush orientation and pressure appropriate to the exact product, keeping the upper edge light and controlled while increasing saturation toward the intended bright area. Avoid harsh horizontal product lines unless a graphic band is the actual goal.
Previously lightened hair requires special caution. Do not drag fresh lightener through fragile pale ends merely to make every section look identical. Map overlap boundaries before mixing, isolate old light pieces, and use professional help when the history is uncertain or overlap cannot be controlled.
Support materials vary by system and technique. Open-air painting, film, cotton, mesh, boards, or foils can affect isolation and product behavior. Use only materials and heat conditions compatible with the exact instructions. Balayage can include isolation without becoming the same placement pattern as uniform foil rows.
Estimate product, tools, and application time
Count planned painted pieces by zone. Record the face frame, top, each side, back, and interior. Piece count helps estimate product and timing; it is not a quality target. Long, dense, or highly layered hair may require more product and a more complex map.
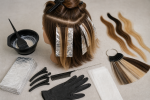
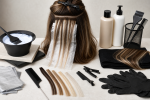
Prepare gloves, nonmetallic bowl and brush if required, clips, tail comb, sectioning board or approved support material, timer, protective cape, towels, and enough product for the complete map. Protect floors, counters, clothing, and nearby surfaces. Keep every original package and instruction available until the service is complete.
Application duration matters because the first and last pieces can receive different exposure. A complex full-head map, major lift, corrective history, or fragile hair may be inappropriate for a solo home application. Arrange professional service when the sequence cannot fit within the product’s timing and monitoring directions.
Follow color and lightener safety boundaries
The U.S. Food and Drug Administration hair dye guidance advises following package directions, wearing gloves, completing directed preliminary tests, keeping dye away from the eyes, observing the stated time, and rinsing the scalp well. It warns against using scalp hair dye on eyebrows or eyelashes. Read the warnings for every product involved.
Do not proceed on an irritated, scratched, or sunburned scalp. Maintain suitable ventilation, keep the work area controlled, and retain ingredient information. Stop use if a reaction occurs and obtain appropriate professional guidance. This article does not diagnose reactions or provide medical care.
The American Academy of Dermatology coloring guidance notes that greater lightening generally requires more peroxide and can increase damage. It supports conservative shade changes and spacing chemical services. A freehand technique does not remove those chemical boundaries.
Rinse and evaluate placement separately from tone
Rinse and complete after-lightening steps exactly as directed. Handle wet lightened hair gently. Dry the hair before judging the gradient, brightness distribution, and tone. Evaluate the normal part, hairline, crown, sides, back, and ends in consistent lighting.
Ask whether the transition begins at the intended height, whether bright pieces align with movement, whether enough natural depth remains, and whether the ends are balanced. Then assess tone as a separate issue. A successful placement map can still reveal more warmth than the target image.
Do not immediately repaint dark pieces or re-lighten warm areas. Preserve the strand-test notes and map. Banding, fragile ends, unexpected dark artificial pigment, or a target requiring another major lift belongs with a qualified colorist.
Plan soft regrowth and tonal maintenance
Balayage often creates a softer visible grow-out because brightness can begin away from the scalp, but upkeep still depends on contrast, placement height, natural growth, and tone. Track the face frame and top surface in similar lighting rather than relying on a universal calendar.
Future lightening should reuse the map and protect already pale lengths. A separate gloss or deposit-only service may address tonal fade without repainting every lightened section; compare that task with the hair gloss guide.
- Save the section map, piece count, starting heights, product details, and timing.
- Photograph the normal part, face frame, sides, and back.
- Separate new-growth placement from old lightened lengths.
- Use gentle cleansing and conditioning suitable for color-processed hair.
- Limit avoidable high heat and prolonged sun exposure.
- Strand-test any tonal refresh on porous ends.
Balayage placement checklist
- Define where brightness should be visible and where depth should remain.
- Map the normal part, hairline, crown movement, mids, and ends.
- Assess natural depth, artificial color, porosity, and fragile zones.
- Test representative visible, dark, colored, and porous sections.
- Choose section direction, surface orientation, spacing, and starting height.
- Increase saturation only where the map calls for more brightness.
- Count pieces and prepare enough product and application time.
- Follow exact ratio, heat, timing, eye-area, and rinse instructions.
- Evaluate gradient, brightness, and tone as separate outcomes.
- Reuse the map to prevent uncontrolled overlap during upkeep.
A balayage plan should look organic but never be arbitrary. The strongest decisions are a visible brightness map, a known starting canvas, representative tests, controlled surface painting, realistic timing, exact label use, and an overlap-aware maintenance record.
Sources and scope
The FDA source supports label-following, preliminary-test, glove, timing, eye-area, scalp-condition, rinsing, and reaction boundaries. The AAD source supports conservative lightening and service-spacing decisions. Neither source provides one universal balayage section map, product formula, developer, processing time, or cosmetic outcome. Use the current instructions for every exact product.