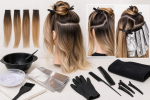
Hair Color Melts: Placement, Sectioning, and Upkeep Guide

Direct answer: a hair color melt connects two or more shades through controlled transition zones so the colors appear to flow rather than stop at isolated bands. The melt can run from roots to ends, across selected panels, or through several fashion or natural tones. Plan it by defining the shade sequence, mapping every transition on the actual haircut, testing adjacent formulas together, and controlling overlap and rinse transfer. A melt is a color relationship across multiple zones, not simply another name for a darker root.
This broader intent distinguishes a hair color melt from a root melt. A root melt specifically connects root depth to the lengths. A general color melt may begin below the root, use several mid-length shades, change direction between panels, or connect fashion colors with no root adjustment.
Build a shade sequence with a visual purpose
Write the planned colors in order before selecting products. The sequence may move dark to light, cool to warm, muted to vivid, or between related fashion hues. State where the eye should notice the strongest contrast and where the transition should nearly disappear.
For every shade, record depth, tonal family, formula role, canvas requirement, and expected fade direction. Adjacent colors need enough relationship to blend intentionally but enough difference to remain visible. If two shades mix into an unwanted neutral or muddy color, they should not share a wide overlap without test evidence.
The oil slick hair guide shows another multi-color design in which hue order, surrounding base, and surface placement determine whether the colors remain readable.
Map transitions on the haircut, not on a flat swatch
Examine dry hair in the normal part and natural fall. Mark layers, perimeter, crown, face frame, density changes, and sections revealed when the hair moves or is tied back. A horizontal transition can break into several visible heights once layered hair bends and separates.
Choose whether each transition follows length, a diagonal panel, a curved contour, or a vertical ribbon. Horizontal zones emphasize a gradual change down the hair. Vertical or diagonal zones can create movement and expose different colors from different angles. Mixing orientations without a plan often produces scattered patches rather than a melt.
Photograph front, side, crown, and back views. Record the start, center, and end of every transition so application and later upkeep can reproduce the design.
Audit the canvas by zone
Record natural depth, previous permanent or direct dye, lightened sections, bands, porosity, density, strand thickness, and fragile areas. Each planned color needs a suitable underlying canvas. A pale pastel zone and a deep saturated zone may require very different starting depths.
Previously lightened ends can absorb deposit rapidly, while stronger mids may remain brighter or warmer. Old direct pigment can alter a new fashion shade. Artificially dark hair may not support a light zone without a separate professional correction. Do not use a stronger developer or extended time as a shortcut around canvas limits.
The light blue hair dye guide provides a focused example of how starting color, porosity, and fade planning affect a light fashion shade before it joins a larger color sequence.
Assign one job to each formula
Define whether each formula deposits depth, adjusts tone, adds a fashion hue, or preserves an existing zone. A lightener changes the canvas within its labeled limits; it is not a melting formula by itself. A depositing color cannot reliably create a much lighter base. A gloss may refine tone but cannot erase major bands.
Use only combinations, ratios, developers, support materials, timing, and heat conditions stated in current instructions. Similar shade names across product systems do not establish compatibility. Keep package and ingredient information for every formula in the plan.
Test adjacent colors together
Isolated swatches do not reveal how colors interact at a boundary. Build a representative strand test with the exact canvas, section size, formula sequence, overlap distance, saturation, timing, rinse, and after-color steps. Include porous and previously colored samples when those zones differ.
Dry the test fully and inspect each pure color, both transition edges, texture, shine, and elasticity. Then simulate ordinary cleansing on a separate approved sample if the product directions allow, observing whether one color migrates into another. A vivid blue beside pale blonde, for example, may need a narrower boundary and a deliberate rinse plan.
Use more than one test when the front, crown, and ends have different histories. One successful strong strand does not represent a fragile porous perimeter.
Choose section orientation and transition width
Use clean panels or subsections that expose the whole transition. Mark the pure zone for Color A, the overlap, and the pure zone for Color B. For a three-color melt, mark both overlaps independently rather than allowing the middle color to drift.
A broad overlap creates a longer blended area but can reduce color clarity. A narrow overlap preserves contrast but demands precision. The correct width depends on the visual plan, formula interaction, hair length, and test result, not a universal measurement.
Keep subsection thickness consistent enough for even saturation. Secure finished hair so neighboring colors do not touch outside their planned boundaries.
Control saturation and tool transfer
Apply each formula evenly through its pure zone, then connect it only across the measured transition. Use separate bowls and brushes where the formulas require separation. Change gloves or clean tools when moving between colors so the deepest or most saturated shade does not contaminate lighter zones.
Do not repeatedly comb every color through the lengths. Indiscriminate pulling can enlarge overlaps, stain porous ends, and flatten the intended sequence. Keep the boundary visible as brush pressure and hand position create the transition.
Use enough product for complete saturation without flooding sections or skin. Avoid dragging color onto areas marked for protection.
Plan application clocks and isolation
Write the application order, estimated time for every zone, labeled processing window, and rinse sequence before mixing. A complex melt with several formulas can create multiple clocks. The first section should remain inside its directions while the last transition is completed.
Foil, film, mesh, or another support should be used only when compatible with the exact product. Isolation must prevent unintended transfer without introducing unapproved heat. Very long or dense hair, several formulas, or corrective color may exceed a realistic solo application window and belongs with a qualified colorist.
Plan rinsing to limit color migration
The transition can change during rinsing if a saturated shade runs across a pale zone. Follow each product’s instructions and preserve the planned color separation as much as practical. Work in a direction that does not deliberately wash the deepest pigment through the lightest hair.
Use suitable water temperature and after-color products only as directed. Do not add improvised barriers or chemicals. Record any transfer seen in the strand tests and final rinse because that evidence informs future placement and upkeep.
Follow hair-color safety boundaries
The U.S. Food and Drug Administration hair dye guidance advises following package directions, wearing gloves, completing directed preliminary tests, observing stated time, keeping dye away from the eyes, and rinsing the scalp well. It warns against using scalp hair dye on eyebrows or eyelashes.
Do not color an irritated, scratched, or sunburned scalp. Stop use if a reaction occurs and obtain appropriate professional guidance. This article does not diagnose reactions or provide medical care.
The American Academy of Dermatology coloring guidance supports caution with major shade changes and chemical-service stress. These sources establish precautions, not one melt sequence, overlap width, processing plan, or final appearance.
Evaluate each zone and transition after drying
Dry the hair before judging the result. View the normal part, crown, sides, back, layers in motion, and tied-back styles. Assess each pure color first, then every transition, then the overall sequence. Check for missing colors, muddy overlap, abrupt bands, unexpected warmth, staining, asymmetry, and buried highlights.
Inspect texture and elasticity separately from color. A coherent sequence is not a reason for another immediate service if the hair condition is unsuitable. Preserve the section map, test records, and dried photos for any later correction.
Plan fade and refresh by color zone
Different colors may fade at different rates and toward different undertones. Porous ends may release pigment quickly or hold an unwanted stain. There is no universal wash count or refresh date. Track each zone in comparable lighting.
Decide whether upkeep requires one depositing shade, several separated refresh formulas, a gloss, or no chemical step. The hair gloss guide helps distinguish a tonal refresh from rebuilding the complete multi-color map.
- Save shade order, formulas, ratios, zone boundaries, overlaps, order, and timing.
- Photograph transitions straight, curved, and through normal movement.
- Keep deep or vivid refresh color off pale zones unless the map includes it.
- Use gentle cleansing and conditioning for color-processed hair.
- Limit avoidable high heat and prolonged sun exposure.
- Retest adjacent colors when the canvas or formula changes.
Hair color melt checklist
- Define the complete shade sequence and strongest contrast point.
- Map horizontal, diagonal, or vertical transitions on the haircut.
- Audit starting depth, old pigment, porosity, and fragile zones.
- Assign one lift, deposit, tone, or protection role to each formula.
- Test adjacent formulas together with the exact overlap and rinse plan.
- Mark pure zones and each transition in every subsection.
- Control bowls, brushes, gloves, saturation, and unintended transfer.
- Keep all formulas within labeled timing, heat, eye-area, and rinse rules.
- Evaluate pure colors, transitions, condition, and movement separately.
- Record the map for color-specific fade and upkeep.
A useful color melt is engineered around the relationship between shades. Canvas-specific testing, intentional orientation, measured overlaps, strict isolation, and a color-by-color upkeep record keep the page distinct from a root-only gradient or a generic multi-color idea list.
Sources and scope
The FDA source supports label-following, preliminary-test, glove, timing, eye-area, scalp-condition, rinsing, and reaction boundaries. The AAD source supports conservative color-change and chemical-service decisions. Neither supplies a universal melt palette, formula, section map, overlap distance, fade schedule, or cosmetic result. Follow current instructions for every exact product.