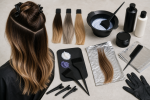
Ombre Color Placement: Placement, Sectioning, and Upkeep Guide

Direct answer: ombre hair uses a deliberately visible progression from a deeper upper section to lighter or differently colored ends, with the main transition positioned below the root area. Plan it by defining the dark anchor, the transition height and shape, the end target, and the amount of contrast the hair can support. Test the lightening or depositing sequence on representative lengths, stagger the boundary to suit the haircut, and protect previously processed ends from unnecessary overlap.
Ombre is distinguished by its larger dark-to-light structure. A general color melt can connect many colors anywhere on the hair. A root melt begins at the root and prioritizes a seamless bridge. Sombre uses a subtler depth change and finer distribution. Ombre keeps a more readable upper anchor and end contrast.
Define the dark anchor, transition, and end target
Describe the design in three zones. The upper anchor is the natural or deposited depth that remains dominant near the root. The transition is the area where depth changes. The ends carry the lightest or most contrasting target. Record each zone’s depth, undertone, width, and formula role.
Choose whether the contrast should look natural, graphic, warm, cool, or fashion-led. A dark brown upper section with beige ends creates a different transition problem from a medium copper upper section with bright red ends. The red hair color ideas guide helps separate base depth, tonal direction, and placement before a formula is chosen.
Place the transition by haircut proportion
Assess dry hair in the normal part and natural fall. Mark the chin, shoulders, longest perimeter, shortest layers, and sections that move forward. Transition height should relate to the visible length rather than an arbitrary distance from the scalp.
A high transition on short layers may leave little dark anchor. A very low transition on long hair may read as light ends rather than a complete ombre. Staggering the start point through layers can prevent one horizontal belt, but the variation should remain intentional.
The long hair styles guide provides context for how layers, parting, and movement change where a transition remains visible.
Audit the starting canvas from mids to ends
Record natural depth, permanent or direct dye, previous highlights, old ombre bands, porosity, density, strand thickness, and fragile ends. Ombre often asks the lower half to support the greatest depth change, but that section may also have the most accumulated chemical and heat history.
Artificially dark lengths may expose uneven warmth or resist predictable lift. Previously pale ends can become excessively fragile under another full application. Direct pigment can alter the next shade. Do not assume a stronger developer or longer time will create a uniform end target.
Complex dark-color removal, severe banding, major lift, or compromised ends belongs with a qualified colorist and may require more than one session.
Choose the end target within canvas limits
Define the minimum acceptable end depth and the tonal range that can work with the upper anchor. A photograph of pale ends does not establish that the current hair can reach the same level. The realistic target comes from strand-test evidence and hair condition.
If the ends are already light enough, the task may be deposit or tonal adjustment rather than new lift. If they are too dark, a gloss cannot create blonde brightness. If the canvas is uneven, one toner cannot remove every depth band.
Keep lift and deposit decisions separate so the formula plan does not ask one product to perform an unsupported role.
Strand-test the complete ombre section
Select a strand that includes the dark anchor, proposed transition, mid-length history, and end condition. Reproduce the intended product, ratio, section thickness, transition method, saturation, support, timing, rinse, and after-color steps allowed by the label.
Dry the strand fully. Evaluate the retained dark depth, transition shape, exposed warmth, end level, tone, texture, and elasticity. Repeat on a porous end and a resistant or previously colored section when the histories differ.
A strand test can show that the end target should remain deeper, the transition should begin lower, or the plan should stop. It is evidence for sampled hair, not proof of uniform whole-head response.
Build a staggered section map
Divide the hair into controlled panels that reflect density and haircut movement. Within each panel, mark the earliest transition point, the main transition center, and the start of the end zone. Vary those points in a recorded pattern rather than randomly.
Surface sections can begin slightly lower or use a softer boundary to preserve a natural upper anchor. Interior sections can support selected higher pieces for connection. Face-framing areas should be planned separately because they are shorter and more visible.
Keep subsections thin enough for even saturation. Secure completed panels so product does not transfer above the mapped transition.
Create a transition without a hard belt
The boundary may be softened through controlled brush feathering, staggered slices, selected weaving, or another method supported by the professional plan and product. Every method should preserve enough product on the end zone while avoiding one straight horizontal line.
Do not over-comb lightener or deep deposit through the boundary. Repeated pulling can create weak saturation in the end zone and uncontrolled overlap in porous hair. Maintain visual control of the transition as each subsection is completed.
Use separate tools or clean them when formulas change. Wipe accidental transfer before it expands the transition outside the map.
Saturate the end zone consistently
Ombre ends need enough appropriate product for the section thickness and density. Under-saturation can leave dark spots; excessive product can leak. Estimate supply needs before mixing and do not stretch a small batch through more hair than it can evenly cover.
Map old pale ends and protect them from unnecessary overlap. A previously lightened tip may need no fresh lightener while a darker area above it receives a controlled application. Follow only label-supported ratios, developer, timing, support materials, and heat conditions.
Plan application order and timing
Write the panel order, estimated application duration, and labeled processing window before starting. Dense or long hair can make an ombre application slower than expected. The first panel should remain within its instructions while the last end section is saturated.
Prepare enough product, gloves, clips, timers, cape, towels, nonmetallic bowls and brushes when required, and all approved support materials. Protect clothing and surfaces, maintain suitable ventilation, and retain every package and ingredient list.
Do not add unapproved heat or extend processing to force darker ends to match lighter ones.
Follow hair-color safety boundaries
The U.S. Food and Drug Administration hair dye guidance advises following package directions, wearing gloves, completing directed preliminary tests, observing stated time, keeping dye away from the eyes, and rinsing the scalp well. It warns against using scalp hair dye on eyebrows or eyelashes.
Do not color an irritated, scratched, or sunburned scalp. Stop use if a reaction occurs and obtain appropriate professional guidance. This page does not diagnose reactions or provide medical care.
The American Academy of Dermatology coloring guidance notes that greater lightening generally requires more peroxide and can increase damage. These sources support precautions, not one transition height, formula, end level, timing, or final appearance.
Evaluate the structure after drying
Rinse and complete after-color steps as directed, then dry the hair. View the back, sides, face frame, top layers, ends, and hair in motion. First assess the dark anchor, then the transition, then the end zone. Check for a horizontal belt, dark pockets, weak saturation, uneven warmth, end fragility, and left-right imbalance.
A suitable end tone can still sit under a poorly placed transition. A good transition can still end at an unsuitable level. Separate placement, depth, tone, and condition findings before deciding on any correction.
Maintain ends and transition separately
Natural roots may have little effect on a low ombre transition, while lightened ends and depositing tones can change sooner. There is no universal refresh date. Track transition contrast, end warmth, tonal fade, and texture in comparable lighting.
Future lightening should respect the recorded transition and protect pale ends. If depth remains suitable but tone fades, a separate deposit-only service may be enough. The hair gloss guide helps distinguish tonal upkeep from another lift service.
- Save transition heights, panel pattern, formulas, ratios, order, and timing.
- Photograph straight, curved, and moving hair after drying.
- Keep future lightener off fragile pale ends unless test evidence supports the map.
- Use gentle cleansing and conditioning for color-processed hair.
- Limit avoidable high heat and prolonged sun exposure.
- Retest the end zone when its history or formula changes.
Ombre placement checklist
- Define the dark anchor, transition shape, and end target.
- Place the transition in proportion to length and layers.
- Audit old color, bands, porosity, and end condition.
- Set an end target supported by dry strand tests.
- Map staggered start, center, and end points in each panel.
- Control feathering, saturation, support, and product transfer.
- Protect previously pale ends from unnecessary overlap.
- Keep ratio, developer, timing, heat, and rinse inside label directions.
- Evaluate anchor, transition, ends, tone, and condition separately.
- Reuse the map for end-specific upkeep.
Ombre placement succeeds when the upper depth remains intentional, the transition fits the haircut, and the ends reach a test-supported target without uncontrolled overlap. That strong three-zone structure is what separates ombre from a generic melt or a subtle sombre effect.
Sources and scope
The FDA source supports label-following, preliminary-test, glove, timing, eye-area, scalp-condition, rinsing, and reaction boundaries. The AAD source supports conservative lightening and chemical-service decisions. Neither supplies a universal ombre formula, transition height, end level, maintenance interval, or cosmetic result. Follow current instructions for every exact product.