Wide-Tooth Combs for Wigs: Selection, Use, Cleaning, and Replacement

Direct answer: Choose a wide-tooth comb for wigs by matching tooth spacing, length, taper, rounded tips, material, surface finish, spine strength, handle control, and flexibility to the disclosed fiber and curl pattern. Examine every gap and edge for burrs, molding seams, cracks, chips, or a broken tooth. Support a small section near its upper boundary and release the lowest few centimeters before advancing toward the cap, keeping the teeth outside ventilated mesh, track stitching, bonded zones, adjusters, and attachment parts. Clean between teeth and dry the spine and handle completely. Retire a comb for rough edges, bent or broken teeth, a cracked spine, swelling, warping, persistent residue, or any change that makes passage unpredictable.
Inspect tooth geometry against a contrasting background
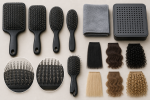
Place the comb over matte white and black cards, then photograph both faces, the spine profile, handle transition, and each tooth root. Log material, overall length, tooth count, spacing, tooth length, taper, tip radius, molding or finishing seams, flexibility, spine thickness, approved texture and moisture condition, wash limits, storage, and the location of any defect.
Measure spacing rather than relying on the name
Wide-tooth is not a fixed dimension. Record center-to-center spacing, clear gap, tooth count, tooth length, and whether spacing is uniform or graduated. Compare those dimensions with fiber bundle size, curl grouping, density, and the intended section. A wider gap can admit a larger bundle but does not establish lower force or suitability for every curl pattern.
Inspect tip radius, taper, and side edges
View each tooth from front, side, and end against a contrasting background. Tips should match the disclosed rounded or tapered geometry without sharp flats, chips, hooks, or flashing. Run a clean soft cloth through gaps only when permitted to reveal snags. Do not use skin contact as a safety test. A smooth tip can still have a rough side seam that catches fiber.
Compare material and finishing route
Identify molded plastic, resin, acetate-like material, wood or wood composite, carbon composite, metal, or another disclosed construction. Check seams, coatings, grain, pores, static behavior, water limits, and cleaning directions. Natural-looking material does not prove seamless construction, while a polished surface can hide a crack. Do not sand, flame-polish, oil, or solvent-wipe a rough tooth.
Check spine, handle, and flexibility
Inspect the spine across its full length for stress whitening, bowing, cracks, voids, and loose inserts. Compare handled and handle-free shapes for grip, reach, balance, and sightline. Flex only by the maker's inspection route. A comb that bends excessively can close gaps around fiber, while a brittle spine can fail suddenly under a dense section.
Match the gap pattern to the disclosed texture
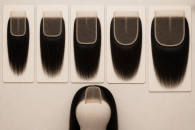
Check the maker record for the exact manufactured filament or processed human-hair description, strand pattern, and allowed moisture condition. Straight lengths, loose waves, grouped curls, and compact curls can require different spacing and grooming routes. Some designs call for fingers only. A measured gap cannot override an instruction to preserve curl groups or avoid dry combing.
Survey resistance before the first insertion
Stabilize the cap on its approved support and separate loose crossings, end knots, nape friction, dense mats, track catches, and attachment interference into different observations. Select a bundle that rests inside the gaps without compression. Hold that bundle near its upper boundary. Never push the teeth into compacted fiber merely to see whether the comb can enter.
Clear a bottom zone before advancing
Enter below the lowest crossing with the teeth parallel to the strand direction. Release only a few centimeters, remove shed fiber, and repeat on the newly opened zone. If the comb lodges, withdraw along the entry path instead of rotating the spine. Stop for stretching, cap movement, tooth deflection, or unchanged resistance; handle leverage is not a correction for a blocked path.
Set a construction exclusion perimeter
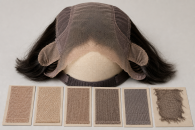
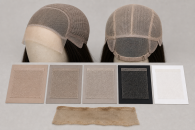
End the comb route before ventilated mesh, individual knot fields, track stitching, hand-tied sections, bonded strips, tape, adjustment bands, clips, or built-in combs. Broad gaps can still capture a track or several anchored hairs. Switch to the wig maker's base-area method instead of sliding teeth sideways beneath an attachment or using the spine to lift it.
Clean every gap without modifying the finish
Remove loose hair by hand or an approved soft method, then follow the material-specific wash or wipe directions. Clean tooth sides, roots, spine, handle transitions, hanging holes, and textured grips. Do not scrape residue with a blade, abrade seams, soak porous material without support, or use high heat. Dry all gaps and hidden joints before enclosed storage.
Retire the comb at the first unreliable edge
Discard or remove from wig use a comb with a broken, bent, sharp, chipped, hooked, or rough tooth; cracked or bowed spine; exposed insert; flaking coating; swelling; warping; persistent residue; odor after drying; or a seam that catches the cloth or fiber. Filing one tooth changes spacing and surface finish and does not restore the original geometry.
Decision table
| Checkpoint | Continue when | Stop or replace when |
|---|---|---|
| Spacing | Gap and tooth length fit the documented section and pattern | Bundle is forced, spacing closes, or pattern excludes combing |
| Finish | Tips, sides, roots, and seams remain smooth | Burr, hook, chip, flash, crack, or rough molding line |
| Structure | Spine and handle stay straight and controlled | Stress whitening, bow, excessive flex, looseness, or break |
| Use | Each bottom zone clears before the next boundary is approached | Compacted fiber, cap movement, tooth deflection, or unchanged resistance |
| Care | Every gap and joint is clean and fully dry | Residue, swelling, warping, coating loss, or damp storage |
Keep tool geometry separate from hair-loss claims
AAD sources support limiting repeated pulling but do not rank comb materials or tooth spacing. FDA hair-product information applies to any nearby detangler or cleanser, not the comb itself. The physical inspection, wig directions, and recorded force boundary control the decision.
- AAD hairstyle tension guidance: Persistent load at the cap boundary ends the combing attempt.
- FDA hair-cosmetic overview: Assess a nearby detangler or cleanser under its own label rather than through tooth design.
- AAD weave and extension guidance: Preserve visibility of the attachment area while the loose lengths are managed.
Resolve the hair system before selecting tooth spacing
The related extension resources help identify fiber, format, and placement. They cannot determine comb clearance, tip finish, spine strength, or an allowed route through a particular curl pattern.
- extension fiber selection: records hair material before a tooth gap is chosen
- crown extension planning: keeps shade and placement outside comb geometry
- extension format overview: separates attachment construction from loose-length detangling
Final checklist
- Tooth spacing, length, taper, rounded tips, material, seams, and spine are recorded.
- The documented texture and moisture condition explicitly permit a comb.
- A selected bundle rests inside the gaps without being compressed.
- Each lower zone opens before the route approaches mesh, tracks, or attachments.
- Any broken tooth, rough edge, cracked spine, swelling, or warping triggers retirement.
Wide spacing does not promise snag-free detangling
A smooth wide-tooth comb can document geometry and controlled passage in one section. It does not prove reduced breakage, no shedding, curl preservation, damage-free lace, or suitability for another wig.
A wide-tooth wig comb is a spacing, tooth-finish, material, spine, handle, section-support, cleaning, and replacement decision. Retire it when any edge or structural change makes the path through fiber uncertain.