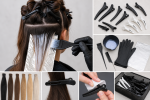
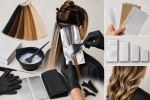
How to Choose and Use Highlighting Foil at Home

Direct answer: choose highlighting foil wide enough to support the selected hair section with sealed side margins and long enough to extend beyond the coated hair. Medium-weight salon foil is usually easier to fold and stabilize than extremely thin household foil, but the lightener or color instructions must explicitly permit foil or enclosed processing. Precut and organize every sheet before mixing. At-home foil work is not the right choice for major correction, fragile hair, uncertain chemical history, or a target that requires substantial lift.
Foil separates selected strands from surrounding hair, supports the section during application, and helps keep different formulas or uncoated hair apart. It can also change how a product processes, so material choice and folding technique never override the product label.
Confirm that the product permits foil
Read the complete instructions before buying or cutting foil. Some lighteners and colors describe open-air use, cap methods, foils, papers, or other systems. Do not wrap a formula that is directed to process in open air. Do not add external heat or tightly seal a package unless the manufacturer specifically permits that method.
At-home highlighting combines section selection, product placement, timing, and monitoring. If you cannot see or reach the planned area clearly, use a simpler placement or seek professional help. Back-of-head corrections, multiple formulas, dark permanent-color removal, and overlapping bleach require more control than a foil sheet can provide.
Use the at-home hair color planning guide to assess product quantity, starting condition, and application limits before choosing foil.
Select foil width and length
The foil should be wider than the hair slice. Leave enough margin on both sides to fold or secure the packet without pushing product out. A very wide sheet wastes material and becomes harder to control close to the head; a narrow sheet encourages overfilled sections and leakage.
Common precut widths can support narrow face-framing pieces, standard highlights, or wider panels. The correct width depends on the selected section and placement, not on the overall hair length. If the slice is wider than the foil, divide it into controlled subsections instead of allowing strands to hang over the edge.
Length should extend from the starting point beyond the coated ends. For long hair, use a longer sheet or a manufacturer-supported folding method rather than leaving processed ends outside the packet. Excessively long foil can become heavy and pull at the root. Precut a small range only when the placement map genuinely uses different section lengths.
Compare foil thickness and surface
Very thin foil is light but tears, wrinkles, and shifts more easily. Heavy foil holds shape but can feel bulky near the root and add weight when many packets are placed. A medium foil that folds cleanly without springing open is a practical starting point for controlled sections.
Embossed or textured foil can add grip between hair and sheet. Smooth foil slides easily for repositioning but may require more careful support. Texture should not be so sharp that it snags hair. Color-coated foil can help organize zones, but the coating must be intended for cosmetic foil use and compatible with the product.
Do not assume ordinary kitchen foil has the same thickness, cutting quality, or handling characteristics as salon foil. Whatever foil is selected, inspect the edges for tears or sharp projections and keep it away from eyes and skin.
Prepare every sheet before mixing
Cut or separate the required number of sheets in advance. Stack them in application order on a clean dry surface. Fold a narrow leading edge only if that technique supports stable placement and does not create a bulky ridge. Keep foil away from water, active product, and contaminated gloves until each sheet is needed.
Complete the section map and rehearse hand placement. Set out compatible clips, tail comb, tint brush, non-metal bowl when directed, gloves, timer, towels, and disposal area. A foil application should not pause while more sheets are cut.
Choose the color route before choosing packet layout. The hair color selection and application guide distinguishes formulas that may require different placement and processing methods.
Choose controlled sections
A foil packet can support only the hair that fits flat enough for even product placement. Thick sections may look coated on top while interior strands remain dry. Very fine sections can overprocess quickly or produce a result that is more blended than intended. The appropriate slice depends on the formula, technique, starting level, and visual goal.
Weaving selects alternating strands for a diffused effect. Slicing selects a continuous section for a stronger panel. Neither method is automatically easier. Keep the selected strands organized from root to end and remove shorter hairs that do not belong in the packet.
Placement controls the pattern. Face-framing, part-line, surface, and interior foils create different visibility and maintenance. The red hair color ideas guide illustrates why shade placement and upkeep should be planned together even when the target color is not red.
Load, place, and fold the foil
Support the foil close to the selected starting point without pressing a sharp edge against the scalp. Keep the hair flat on the sheet. Apply the label-directed mixture with controlled brush strokes and stay within the foil margins. Avoid saturating beyond the point where product can expand or squeeze from the packet.
Fold the foil according to the permitted technique. A simple bottom fold shortens the packet; side folds can improve containment but may push product inward if made too tightly. The packet should remain secure without crushing the hair, scraping the scalp, or creating a hard crease at fragile ends.
Keep adjacent untreated hair away from the loaded sheet. If product leaks, remove and correct the section rather than wrapping a second foil around an uncontrolled packet. Do not repeatedly open, smear, and reseal the same packet without considering timing and product movement.
Monitor timing and hair condition
Start and record timing as the product directs. A long application can make the first and last packets process for different periods. Use a section count and application order that you can complete within the supported workflow. Do not exceed the maximum stated time to chase a lighter result.
The American Academy of Dermatology notes that lightening hair more than three shades generally requires higher peroxide volumes and can cause more damage. That supports a conservative boundary: substantial lift and correction are professional-service decisions, not reasons to leave home foil packets longer.
Check packets only in the manner and frequency permitted by the product. If the hair shows unexpected weakness, excessive heat, or the user experiences burning or other concerning symptoms, stop according to the product safety directions and seek appropriate help. This guide does not diagnose reactions.
Keep foil work inside hair-dye safety rules
The U.S. Food and Drug Administration advises consumers to follow every label and package direction, complete the directed skin test before each use, wear gloves, keep dye away from the eyes, observe processing time, and rinse the scalp well. The FDA also advises against coloring an irritated, sunburned, or damaged scalp and describes service-spacing precautions.
Foil does not make a formula irritation-free, prevent all leakage, or ensure even lift. Keep packets away from the face and eyes. Do not use foil on eyebrows or eyelashes. Do not combine foil with an unapproved heat source.
Remove foil without dragging product
Follow the product’s removal order. Support the hair near the packet, unfold carefully, and slide the foil in the direction that minimizes pulling and contact with surrounding hair. Place used foil directly in the prepared disposal area rather than on clean tools or unprotected surfaces.
Rinse as directed and ensure product is removed from the scalp and hair. Do not reuse foil. Clean bowls, brushes, clips, combs, and the work surface while wearing gloves if active residue remains.
Common highlighting-foil mistakes
- Using foil when the product directs open-air processing.
- Making the hair section wider than the sheet.
- Loading thick sections that cannot be saturated evenly.
- Cutting foil after the formula has been mixed.
- Folding so tightly that product is pushed out.
- Applying unapproved external heat.
- Extending processing time to force more lift.
- Reusing wrinkled or contaminated foil.
Final foil checklist
- Verify that the exact product permits foil.
- Choose width and length for each planned section.
- Select foil that folds securely without tearing or excess weight.
- Precut, stack, and organize every sheet.
- Keep sections thin enough for visible saturation.
- Maintain side margins and controlled folds.
- Track application order and maximum processing time.
- Remove carefully, dispose once, and clean the workspace.
Highlighting foil is a separation and control tool. It works only when the formula permits enclosed processing, the section fits the sheet, and the user can apply, monitor, and remove every packet within the stated safety limits.
Sources and scope
The FDA hair dyes guidance supports the label, skin-test, glove, timing, eye-area, scalp-condition, service-spacing, and adverse-reaction boundaries used here. The American Academy of Dermatology coloring guidance supports conservative shade changes and damage-reduction limits. Neither source prescribes foil size or a universal highlighting formula.