Lived-In Blonde Color: Placement, Sectioning, and Upkeep Guide

Direct answer: lived-in blonde keeps deliberate depth near the root and distributes lighter pieces at varied starting heights so new growth joins the design instead of creating one immediate line. Plan it by choosing how much natural or deposited root should remain, mapping brightness around the face and interior, testing each existing color zone, staggering the transition through the mid-lengths, and defining when root, lightness, or tone actually needs attention.
Lived-in does not mean unplanned or unfinished. The low-maintenance effect comes from controlled negative space, a root area related to natural growth, and enough variation between dark and light pieces that a few weeks of regrowth does not erase the structure. It can be warm, neutral, or cool, but the root-to-end relationship matters more than the shade label alone.
Define the grow-out goal first
Choose the acceptable root depth and the amount of time the design should remain visually connected as hair grows. A short shadow creates a polished but more frequently visible root transition. A deeper natural zone creates a softer grow-out but can make the ends appear brighter by contrast. Decide whether the root should be natural, softly deposited, or selectively connected with lowlights.
Photograph the usual part, front hairline, crown, sides, nape, and gathered hair. Mark where brightness should begin in each area. A lived-in pattern should not start at one identical horizontal distance from the scalp. Face pieces may begin higher, crown pieces may begin lower, and interior pieces may vary to preserve depth.
Choose a brunette-to-blonde or dark-blonde-to-blonde ratio
Describe the target as preserved depth versus visible blonde. A depth-dominant result keeps a strong natural or brunette base and uses selected blonde ribbons. A balanced result distributes both populations. A light-dominant result remains blonde overall but protects a root shadow and scattered interior depth.
The site’s blonde hair color ideas guide helps compare blonde depths, undertones, and dimensional options before setting this ratio. Use references for placement and contrast, not only for the apparent end shade, because lighting and styling can hide the root structure.
Audit the current canvas by zone
Record natural regrowth, previous root color, old highlights, lowlights, warm bands, direct dye, and porous ends. Determine whether the mid-length already contains a usable transition or one hard line. Previously lightened ends may not tolerate or require the same process as darker natural roots.
Separate the jobs of lift, deposit, and tone. Dark natural sections may need tested lightening to join the pattern. Pale ends may need protection or only tone refinement. An old dark band may require correction rather than another layer of blonde color. Lived-in placement cannot hide every incompatible chemical history.
Map brightness around the face
Decide how close to the hairline the first light pieces should begin, how wide they should be, and how they connect to side and interior ribbons. A strong face frame creates immediate brightness but shows regrowth sooner. Fine, related-tone pieces create a softer transition. Leave enough depth behind the face pieces so they remain visible rather than merging into an all-over light surface.
Check the map with hair tucked behind the ears and pulled back. Pieces that look balanced loose can form an overly bright stripe in a ponytail. Baby hairs and short layers need their own decision; do not assume they can follow the same section size or processing time as longer hair.
Stagger interior starting heights
Use varied diagonal or curved sections through the crown, sides, and back. Fine weaves produce diffuse brightness; wider weaves create stronger ribbons. Preserve dark spaces between light sections, and avoid stacking every foil at one level. The transition should look intentionally irregular while remaining repeatable from the recorded map.
Consider the haircut. Layers expose interior brightness at different heights, while one-length hair can hide lower pieces until it moves. On curls and coils, map the natural grouping so light pieces support the curl pattern instead of cutting across it randomly.
Strand-test roots, bands, and ends separately
Choose representative samples from natural regrowth, any resistant or dark band, a typical mid-length, and a porous end when these zones differ. Record product, ratio, developer or activator, subsection thickness, saturation, timing, rinse method, and fully dry result.
Judge lift, exposed undertone, breakage risk, deposit uptake, and whether the tested transition remains soft. A pale end that looks suitable may not prove the dark root can reach the planned brightness. A root test does not prove old color will respond the same way. Revise the map or seek professional correction when the zones cannot meet safely in one plan.
Coordinate root depth and blonde tone
A root shadow, melt, or lowlight should have a clear job: connect natural growth, soften a line, or restore interior depth. It should not be applied automatically through all blonde lengths. Select depth and undertone from strand tests and the natural root, then isolate areas where pale hair could absorb deposit too strongly.
Tone the blonde only after judging the dry canvas. Warm, neutral, and cool results fade differently against the root. The hair gloss guide explains how to compare deposit, processing, shine, and washout before adding a separate finishing formula.
Prepare a multi-zone application plan
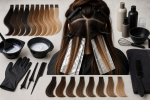
Gather separate bowls and brushes when needed, gloves, clips, a tail comb, foils or another supported barrier, towels, and timers. Write the sequence for face pieces, interior brightness, root deposit, and end protection before mixing. Keep formulas isolated and use enough product for complete saturation in each selected section.
Follow each product’s current directions. Do not borrow a ratio, additive, or processing time from another line. If root, mid-length, and end clocks differ, use the strand-test evidence and label limits rather than extending one zone to compensate for another.
Plan upkeep by visible trigger
Separate four triggers: the root connection becomes too sharp, the brightness pattern loses its shape, the blonde undertone shifts, or the lengths need condition-focused care. These events may occur at different times. A tone refresh does not require new lightening, and a root connection does not require pulling formula through the ends.
Low-tension styling can display the design without repeated high heat. The site’s long hair styles guide provides ideas for distributing tension and showing dimension while keeping daily handling practical.
Follow hair-color safety boundaries
Follow the current label and enclosed directions, including preliminary test instructions, gloves, timing, rinsing, and restrictions. The FDA hair-dye guidance notes that reactions can occur even after earlier uneventful use and states that scalp hair dye is not intended for eyebrows or eyelashes. Do not apply over an irritated or damaged scalp.
The American Academy of Dermatology coloring guidance recommends conservative shade changes and following manufacturer testing directions. These sources establish precautions, not one lived-in blonde formula or an assured result. Extensive old color, fragile lengths, severe bands, or a large lightness change is a reason to consult a qualified color professional.
Lived-in blonde checklist
- Define acceptable root depth and the desired grow-out interval.
- Choose a preserved-depth to visible-blonde ratio.
- Map the part, hairline, face frame, crown, sides, interior, and nape.
- Record natural regrowth, previous color, bands, porosity, and fragile ends.
- Test materially different roots, mid-lengths, and ends separately.
- Stagger starting heights and preserve dark negative space.
- Assign root depth, lightening, tone, and end protection to explicit zones.
- Refresh root connection, placement, tone, and condition only when each trigger appears.
A lived-in blonde succeeds when the grow-out is part of the original design. Preserved root depth, staggered brightness, representative tests, and trigger-based upkeep create a blonde pattern that remains understandable as the natural root advances.