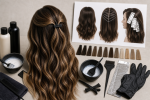
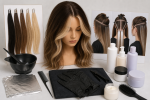
Teasylights: Placement, Sectioning, and Upkeep Guide

Direct answer: teasylights use controlled backcombing inside selected highlight sections to push shorter hairs and some natural depth toward the root, creating a diffused transition into brighter mids and ends. Plan them by setting the transition height, section width, backcomb depth, brightness map, and packet count before mixing. Test representative strands, protect previously lightened ends, and follow the exact product timing. More teasing does not automatically create a better blend and can make removal harder on fragile hair.
The unique decision is the backcombed transition zone. Babylights rely on very fine weaves, and balayage relies on painted surface placement. Teasylights deliberately compress some hair near the root so the lightened section begins with irregular softness rather than one hard line.
Define the transition height and visible brightness
Decide where brightness should begin around the face, part, crown, sides, and back. A low transition preserves more natural root; a higher transition creates brightness closer to the scalp. Write down where the blend should be softest and which pieces should remain stronger.
Common goals include:
- Softening an old highlight line without painting every root.
- Creating bright mids and ends with retained root depth.
- Building a diffused face frame that is less graphic than a money piece.
- Connecting dimensional ribbons through layered lengths.
- Correcting bands, which usually requires professional assessment.
Hair movement affects where the transition is visible. The long hair styles guide provides context for how parting, layers, and low-tension styling change the visible surface.
Assess whether the hair can tolerate backcombing
Record natural depth, old color, highlights, porosity, tangling tendency, curl pattern, density, strand thickness, and fragile zones. Backcombing adds mechanical manipulation before a chemical service. Very compromised, highly tangled, or breaking hair may not be a suitable canvas.
Map previously lightened ends and old bands. Do not assume the backcomb automatically protects pale hair from overlap. Selected strands can still contain lightened sections inside the packet.
If the target requires a very pale level, review the starting-base boundaries in the light blue hair dye guide. A diffused root cannot make an unrealistic lift safe or predictable.
Practice controlled backcombing before mixing
Use a clean dry test section. Hold it with even tension and use the chosen comb to move a measured portion toward the root. The compressed area should create a transition without becoming a tight knot. Practice the number and direction of strokes until the process is repeatable.
Control four variables:
- Section thickness: thin enough for even saturation.
- Backcomb depth: how much hair is pushed toward the root.
- Transition height: where the bright section begins.
- Retained tail: the hair remaining smooth inside the packet.
Excessive teasing can make the transition too dark, create difficult knots, and lengthen detangling. Inconsistent teasing can create uneven start points. The goal is controlled diffusion, not maximum compression.
Build a zone-by-zone section map
Mark the normal part, front hairline, crown growth, sides, interior, and nape. Choose diagonal, horizontal, or curved sections based on movement and visibility. Record whether each selected section uses a weave, slice, or surface selection before backcombing.
Count packets by zone and note the intended transition height for each. A face-frame piece may begin higher than an interior ribbon. Keep mirrored areas consistent unless deliberate asymmetry is part of the design.
Leave enough unselected hair to preserve dimension. Backcombing every section can produce a dense bright result with a dark compressed root rather than a balanced blend.
Use representative strand tests
Test a visible front piece, dark interior piece, previously colored strand, and porous end when relevant. Reproduce the planned section, backcomb, product, ratio, packet material, timing, rinse, and detangling process allowed by the label.
After drying, assess lift, warmth, transition softness, strand condition, and how easily the teased area releases. If the hair becomes overly elastic, rough, fragile, or difficult to detangle safely, stop and choose another plan or professional assessment.
Do not increase developer, add unapproved heat, or exceed time because the blended section looks darker near the root. The transition is supposed to retain depth.
Load packets while controlling overlap
Place the smooth retained tail on the foil or approved support. Apply product according to the label, keeping it away from the compressed root area unless the exact design and system require otherwise. Saturate selected hair evenly without overloading or leaking into neighboring strands.
Map old lightened ends before application. Avoid coating fragile pale sections again merely for uniformity. Complex overlap, bands, and multiple formulas are strong reasons for professional service.
Fold packets consistently and keep them in application order. Use only label-compatible support materials, heat conditions, ratios, and processing times.
Estimate packet count, supplies, and timing
Teasing each section adds time. Estimate the duration for sectioning, backcombing, loading, monitoring, rinsing, and detangling. Confirm that the first and last packets can remain inside the product’s timing model.
Prepare gloves, foils or approved support, enough product, nonmetallic bowl and brush if required, sectioning clips, tail and detangling combs, timer, cape, and towels. Keep every original package and instruction. Protect surfaces and maintain suitable ventilation.
If the map is too large to execute consistently, reduce the scope or arrange professional service before mixing.
Follow color and lightening safety boundaries
The U.S. Food and Drug Administration hair dye guidance advises following package directions, wearing gloves, completing directed preliminary tests, keeping dye away from the eyes, observing stated time, and rinsing the scalp well. It warns against using scalp hair dye on eyebrows or eyelashes.
Do not proceed on an irritated, scratched, or sunburned scalp. Retain ingredient information and stop use if a reaction occurs. Obtain appropriate professional guidance; this article does not diagnose reactions or provide medical care.
The American Academy of Dermatology coloring guidance notes that greater lightening generally requires more peroxide and can increase damage. A soft transition does not remove chemical or mechanical limits.
Rinse and release the backcomb carefully
Rinse packets and complete label-directed after-lightening steps. Do not force a comb through compressed wet hair. Use the approved conditioning or detangling sequence and work gently from the ends upward, supporting each section.
Dry before evaluating the transition. Check the part, face frame, crown, sides, and back. Assess transition softness, brightness distribution, remaining depth, and tone separately. An even blend can still expose more warmth than the target.
Do not immediately re-lighten dark transition areas. Save the map and test evidence. Knots, breakage, bands, overlap, or another major lift belong with a qualified colorist.
Maintain teasylights without recreating the whole service
The grow-out depends on transition height, contrast, natural growth, and visible placement. Track the part and hairline in similar lighting. Future lightening should reuse the map and isolate previously pale pieces.
Tonal fade may call for a separate depositing service rather than new teased packets. Compare that task with the hair gloss guide.
- Save transition heights, backcomb pattern, packet count, and product details.
- Photograph the normal part, face frame, crown, sides, and back.
- Separate new-growth work from previously lightened lengths.
- Use gentle cleansing, conditioning, and detangling.
- Limit avoidable high heat and prolonged sun exposure.
- Strand-test tonal refreshes on porous ends.
Teasylights planning checklist
- Define transition height, brightness, and retained root depth.
- Assess tangling, porosity, old highlights, and fragile zones.
- Practice a repeatable, releasable backcomb before mixing.
- Map sections, selection type, transition height, and packet count.
- Test visible, dark, colored, and porous strands.
- Protect old lightened ends from unnecessary overlap.
- Confirm realistic application and detangling time.
- Follow exact ratio, heat, timing, eye-area, and rinse directions.
- Release compressed hair gently after rinsing.
- Reuse the map during future maintenance.
Teasylights depend on disciplined backcombing, not simply a soft-looking inspiration photo. A known transition height, repeatable compression, realistic timing, representative tests, careful detangling, and overlap-aware records make the technique easier to assess and maintain.
Sources and scope
The FDA source supports label-following, preliminary-test, glove, timing, eye-area, scalp-condition, rinsing, and reaction boundaries. The AAD source supports conservative lightening and service-spacing decisions. Neither source supplies one universal teasing pattern, developer, packet count, processing time, detangling method, or cosmetic outcome. Use the current instructions for every exact product.