Smokey Eye Makeup: Step-by-Step Safety Guide

Quick answer: Build a smokey eye from light to dark: place a transition shade, deepen the lash line and outer area in thin layers, soften edges, then add liner or highlight only if it serves the shape. This independent editorial guide does not claim first-hand testing, does not diagnose or prescribe, and does not promise a particular result.
Choose the smokey shape before the colors
Decide whether depth stays close to the lash line, lifts at the outer corner, rounds around the eye, or extends softly. Check placement with the eyes open so visible lid space and folds guide the map.
Build depth in thin layers
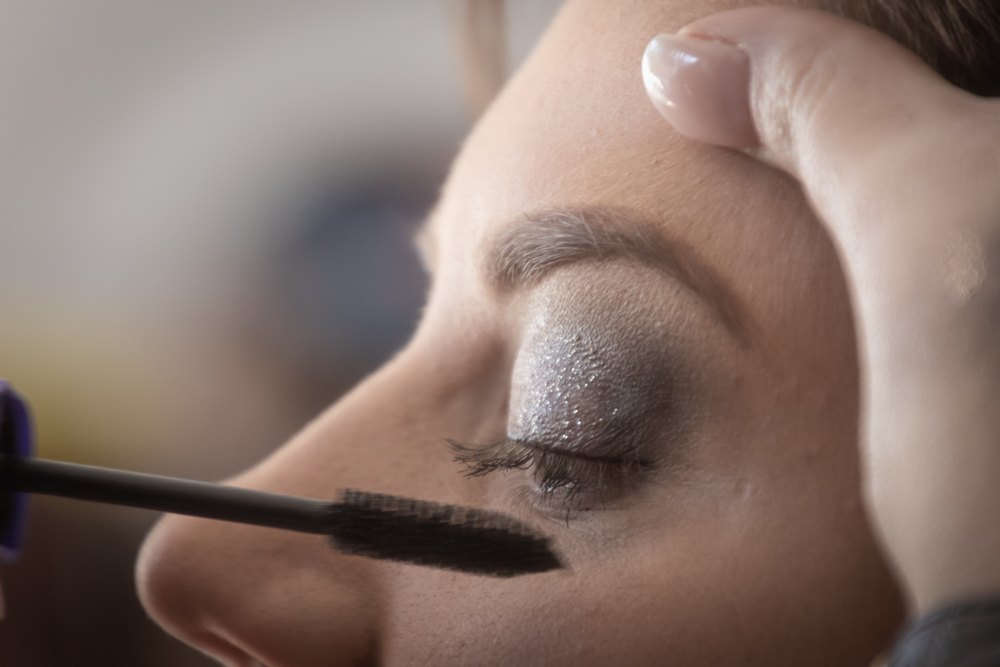
Begin with a controllable amount, keep the darkest tone near the intended focal area, and blend edges with a clean tool. Adding pigment gradually is easier to correct than trying to erase one heavy layer.
Control fallout, liner, and lower-lash placement
Tap off excess when appropriate, keep particles out of the eye, and use only products labeled for the intended area. Lower-lash color can be added narrowly and softened without placing unapproved pigment on the waterline.
Use clean tools and remove without hard rubbing
Wash hands, avoid shared testers, clean reusable brushes, and discard contaminated or changed products. Use a compatible eye remover and stop for persistent redness, pain, swelling, discharge, marked watering, or vision change.
Choose soft brown, charcoal, color, or classic black
A smokey eye describes a gradient, not one required color. Taupe and brown create softer depth; charcoal and black produce stronger contrast; plum, navy, or olive create a colored version. Choose the deepest shade by occasion, lighting, skill, and removal. The darkest available pigment is not automatically the most effective.
Map the gradient before applying product
Decide where the deepest value begins, where it fades, and how far the upper edge should travel with eyes open. Keep the shape compact for a subtle look or extend it outward deliberately. The hooded-eye tutorial explains open-eye mapping when a fold covers the mobile lid.
Prepare with a controlled eye-area base
Use primer or a compatible shadow base only as directed. Apply a thin layer and allow it to settle. A dark cream pencil can intensify the lash line but may set quickly or transfer. The cream-shadow guide helps compare working time. Too much base can make blending patchy.
Place the transition before the deepest shade
Use a midtone near the outer lid or crease boundary and blend its upper edge with a clean brush. This establishes the maximum height. Keep the brow area clean unless highlight is intentional. Check both eyes from normal distance. Transition color should guide the gradient, not create a wide band that must later be covered.
Build the lash-line depth in small sections
Press the deepest powder or eye-area pencil near the upper lashes, beginning at the outer portion. Blend upward a short distance before adding more. Keep pigment out of the eye and use only products labeled for the exact area. Working from dark to lighter edges preserves control and reduces the need for aggressive cleanup.
Connect outer depth without closing the eye shape
Angle the outer shadow according to the desired round, lifted, or horizontal silhouette. Reopen the eye after every pass. Avoid copying a fixed angle when the fold, brow, or eye asymmetry differs. Smokey placement is artistic shading and does not physically lift or change anatomy.
Use the lower lash line as an optional echo
Place a small amount of midtone or deep shade along the outer lower lashes with a clean detail brush. Blend downward minimally. Leave the area bare when eyes are irritated or the product lacks approval for that placement. A fully enclosed dark ring is one style choice, not a requirement for a smokey effect.
Add shimmer only after the matte structure works
A satin or shimmer on the center or inner lid can add dimension, but it should not be used to hide a patchy gradient. Press a thin layer and control fallout. Loose glitter requires explicit eye-area approval and compatible adhesive. Craft glitter and unapproved pigments must remain away from the eye.
Use liner to reinforce, not replace, the gradient
A thin pencil or gel line can deepen the roots of the lashes. Smudge only while the formula permits and with a tool that does not scratch. Avoid the waterline unless the exact liner is labeled for it. The general eyeshadow guide provides formula and hygiene boundaries.
Control fallout before complexion correction
Tap excess from brushes, press pigment, and consider completing dark eye makeup before foundation. Remove fallout with a clean method rather than grinding it into skin. If pigment enters the eye, stop and follow appropriate rinsing or medical guidance. Persistent pain, redness, tearing, or vision change needs professional assessment.
Balance the two eyes by visible landmarks
Compare the highest transition point, outer endpoint, and deepest lash-line zone rather than demanding mirror-image anatomy. Adjust with small additions; removing excess dark shadow is harder than adding it. Photograph in neutral light to detect uneven height. Do not keep expanding both sides in a cycle of correction. Recheck under the event lighting because flash and low light change how dark gradients appear.
Remove dark pigment patiently
Use a remover compatible with the formulas, allow it to loosen product, and wipe gently. Dark pigment may require several clean pads. Do not scrub the fold or pull lashes. Wash hands, clean reusable brushes, and stop using cosmetics during infection or significant irritation, consistent with FDA eye-cosmetic safety guidance.
Smokey-eye checklist
- The color family, gradient height, outer shape, and lower line are mapped.
- Darkness builds from the lash line in thin controlled layers.
- Every pigment, liner, shimmer, and adhesive is eye-area approved.
- Fallout and asymmetry are corrected without expanding the whole shape.
- Tools are clean and removal avoids friction and eye exposure.
Related Beauty Supply Reviews guides
Editorial sources
- https://www.fda.gov/cosmetics/cosmetic-products/eye-cosmetic-safety
- https://www.fda.gov/cosmetics/cosmetic-products/makeup