Color Panel Maintenance: Placement, Sectioning, and Upkeep Guide

Direct answer: maintain a hair color panel by preserving its original visible geometry, reconnecting only the new-growth area that needs it, refreshing deposit according to actual fade, and protecting previously processed lengths from unnecessary overlap. Start every visit with dry photographs and a section map because the haircut, part, root gap, and color contrast can all change how the panel reads.
This is a maintenance problem, not a first-placement guide. The objective is to decide which parts of an existing panel remain correct, which have drifted, and which require a different service. Repeating the original full application by default can widen the block, deepen porous ends, or weaken a previously lightened canvas.
Reconstruct the original panel contract
Collect the original dry-result photographs, scalp section map, formula notes, test results, and intended viewing angles. Record the panel’s starting point, width, direction, depth, border softness, and visible shape. If those records do not exist, photograph the current panel loose, in the usual part, tucked, and in common styles before planning a refresh.
Identify whether the panel was intended as a solid block, a diffused block, an underlayer, or a moving accent. Maintenance should preserve that function. A panel that is visible only in a half-up style needs a different boundary check than one placed directly on the surface.
Measure geometry drift
Root growth moves the colored section away from the scalp, but the panel may also look wider or narrower because of a haircut, part change, breakage, or styling direction. Measure the current root gap and panel width at several landmarks. Compare front, profile, and back views instead of judging only one released strand.
Mark whether the upper edge, lower edge, or side boundaries have moved. Do not automatically recolor stray hairs that now cross the border; first determine whether they belong to the original panel or were redirected by the haircut.
Separate root, middle, and end jobs
Divide the panel into new growth, previously colored mid-length, and ends. Record level, undertone, residual deposit, porosity, elasticity, dryness, and breakage in each zone. The root may need a color connection, the middle may need no change, and the ends may need condition-focused care.
Write an action for each zone: reconnect, refresh deposit, protect, trim, or leave unchanged. This prevents a convenient all-over application from replacing a more precise maintenance decision.
Test the changed canvases
Strand-test representative new growth when lift or permanent deposit is planned. If old bands, resistant gray, porous ends, or previous direct dye differ, test those zones separately. Record product, ratio, developer or activator, section size, saturation, timing, rinse method, and fully dry result.
For deposit refreshes, compare a short contact time and a longer label-supported option on representative hair. Judge depth, undertone, boundary quality, transfer, and whether the refreshed portion connects to the existing panel without making the lengths too dark.
Re-establish the root boundary
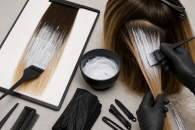
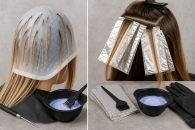
Use the original scalp landmarks and current dry fall to redraw the panel. Section cleanly and clip surrounding hair away. Apply only to the intended root area unless testing supports extending into a faded band. Avoid dragging lightener through previously pale lengths merely to make application faster.
Use gloves, separate bowls and brushes where needed, a tail comb, barriers supported by the product, towels, and timers. Full saturation within the root section matters, but excess product at the border can expand the panel. Follow current label directions for mixture, processing, and rinsing.
Decide whether the lengths need deposit
Compare the middle and ends with the intended depth and undertone. If the color remains suitable, isolate it. If the panel has faded, test a deposit-only refresh that accounts for porous uptake. Ends may require a later application, diluted label-supported option, or no deposit.
A gloss should have a defined job rather than serving as an automatic finishing step. The hair gloss guide explains how to compare tone, deposit, shine, and washout before adding that service.
Control the panel borders during rinsing
Deep or vivid deposit can transfer into adjacent pale or natural hair. Plan the rinse order, isolation, towel protection, and first drying. Do not assume a neat application border will survive if saturated lengths are allowed to rest against surrounding hair.
Evaluate the panel fully dry in neutral light. Wet hair can hide warmth, blur contrast, and make the block appear narrower. Photograph the root connection and all borders for the next maintenance record.
Reassess contrast after every haircut
Layers, bangs, undercuts, perimeter changes, and thinning can alter the panel’s visible mass. A trim may remove the widest part or cause a hidden block to become visible. Re-release the panel in the new shape before recreating the old scalp map.
The long hair styles guide can help compare how braids, half-up arrangements, and gathered styles reveal panels. Use style checks as placement evidence, not as a reason to apply color under tension.
Track tonal drift and neighboring colors
Record whether the panel fades warmer, cooler, lighter, duller, or more transparent. Also inspect the surrounding base, because its own fade can reduce or increase contrast. For a warm panel, the red hair color ideas guide provides related undertone and fade comparisons.
Wash frequency, water exposure, heat, sun, pigment type, and porosity affect the maintenance interval. Set a review trigger based on visible root gap, contrast loss, boundary drift, or condition rather than one fixed calendar date.
Use a minimal-change maintenance plan
Choose the smallest action that restores the panel’s intended function: root-only connection, selective border correction, deposit refresh, targeted condition care, or a revised shape after haircut change. Keep unaffected hair protected.
Document what was left unchanged as carefully as what was recolored. This creates a useful history and reduces repeated overlap. If the canvas becomes fragile, severely banded, or unpredictable, pause and seek qualified professional assessment rather than trying to force the original design.
Follow hair-color safety boundaries
Follow every label and enclosed instruction, including preliminary test directions, gloves, timing, rinsing, and restrictions. The FDA hair-dye guidance notes that reactions can occur after earlier uneventful use and that scalp hair dye should not be used on eyebrows or eyelashes. Avoid applying color over irritated or damaged scalp skin.
The American Academy of Dermatology coloring guidance recommends conservative shade changes and following manufacturer testing directions. These precautions do not establish one panel-maintenance formula or an assured cosmetic result.
Color panel maintenance checklist
- Recover the original dry-result images and section map.
- Measure root gap and border drift at fixed scalp landmarks.
- Assign separate actions to roots, middle, and ends.
- Test every materially changed canvas before applying color.
- Reconnect only the intended root area and protect processed lengths.
- Refresh deposit only where dry comparison shows it is needed.
- Control rinse transfer and inspect the panel fully dry.
- Update the map after haircut, part, contrast, or condition changes.
Good panel maintenance preserves design information. A measured map, zone-specific tests, minimal overlap, and dry-result records allow the block to remain intentional without repeating a full chemical service on hair that does not need it.