Tutorials on How to Quickly do a Fishtail Braid
Have you ever had a bad hair day? Waking up in the morning late and after a quick shower, you remember your hair was rained on yesterday and you just don’t know what to do. Well, it has ever happened to me and trust me, it’s an agonizing experience.
Just like dressing up and wearing your makeup, your hair does play an integral factor when it comes to how you look. for you to command the attention that you want, you need to make sure you look sharp, focused and beautiful and the only you can do that is by looking at your whole look.
Having a bad hair day can ruin your look. getting all right but have a nay when it comes to your hair will leave you with less confidence and an awkward look. It is for this reasons that people come up with a quick hairdo to fix morning hair messes.
There is so many fixes. You can comb your hair up, have it down or just fold it upward but there is one hair look that keeps on trending no matter the season. The fishtail braid is one hair fix that is worn everywhere. You just can never go wrong with this kind of hair fix.
The do is simple, effortless and does not require a lot of tools. All you require to have is your hands and the crafting technique and you are good to go. You say you require an expert in this? No way, believe me, you can do it yourself if you take the effort to learn the simple technique involved.

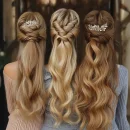
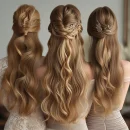
Fishtail Braid
What is a fishtail braid?
I will give it a simple explanation of a quick hairdo that requires your hand and some crafting skills. The skills are simple and once you get them. You will find yourself wearing the do even if you don’t have a bad hairdo.
The good thing about the hairdo is that not only is it simple, but also when you have it on your head, you can have it the whole day. From your workplace to your dinner to a night out with your girls, oh and when it gets messier, the pretty it looks, impressing right?
There are two types of the fishtail braid
- The regular
- The French one
The difference between the two is where they start. When it comes to the regular fish braid, it starts at the back of your neck while when it comes to the French one, the fishtail starts from the centre of your head. To learn more, read along an be ready to learn.
back to menu ↑Tutorial on how to make a regular fishtail braid
It is the most common of the braid as it is simple and a quick way to fix your hair. For you to get it right, you must be able to know where your starting point will be and be consistent in your do. Use the following five quick steps;
- Create a ponytail
So, you are ready to start, you need to create a starting point for your tail. This is done by holding your hair at the back. Since it is your first time, you might need the help of a disposable elastic band that you will cut of at the end.
Be sure to remember that your starting point is key. You need to make sure that you place the ponytail at the centre of your head. The hair should be hanging just at the back of your neck for a more balanced and neat look. are you done? let’s go to the next move.
- Divide your ponytail
This is where the technique begins. You need to take the hanging hair and divide it into two even sections. This is easy, right? the two sections will be the left side and the right side. Making them even will make sure that the result is also even for a fine look.
Form the two sectioned that you have divided, that is where you will be dividing the smaller sections that you will be interweaving in the next step. It is vital to get this easy step before you go to the next one. Am sure you are done, let’s weave now.
- The weaving part
Now that you have understood the two parts the third one should be easy. You need to take a thin strand of hair from the left section. You need to make sure that the strand is from the outside edge of your hairline. Once you are done, you need to pull it over across the right side.
Once you are done, you need to pull the hair and make sure you tuck the thin strand under the right section. After you are done, the left thin strand should be part of the right section part. Once you are done, you are ready for the other part.
Just like you did on the left side, you need to take a fine strand on the outer edge part of your hair and pull it up and over to the left side section. Tuck the thin strand under the left side to make sure it becomes part of the right side. While doing so, remember to grip the hair tight to tighten it.
- Maintain the braid
Now that you have learnt the technique, you need to maintain the braid until you come to the end of the braid. Make sure you make the strands thinner as you go downwards so that the fishtail will look even and neat once you are done. Grip the hair well to make sure the loop is tight enough and no corns are formed.
- Polish the look
Now that you are done, you need to make the finishes. That involves taking a band and holding the end of the tail. Make sure you leave some hair to unweave where you will put the band. Once you are done, you can now create a tousle to loosen your hair by rubbing it between your hands.
If your hair has a lot of layers, it will be wise to leave it untouched. Once you are done, cut the elastic band at the beginning of the tail and your look is done. See how effortless it is? Now, let’s see how you could have done it if it was a French fishtail braid.
back to menu ↑Tutorials on how to make a French fishtail braid
It’s not as difficult as it sounds. The technique change with was the hair is supposed to start. Like the regular one, make sure your starting point is at the centre part of your head to maintain balance. For you to make a French one, you need to follow these 3 simple steps;
- Know where to start
Locate the point on your head where you need to start your weaving. Unlike the regular one, in this one, you don’t need the help of a band. You need to assemble up a section of your hair at the crown of your head. The location should be on eye level or higher and should be centrally located.
- Start to weave
You need to split up the gathered hair into two parts, the right side and the left side part. Pull up a thin strand from the left part near the hairline. You need to move it across to the right part and tuck it under the right one to be part of it.
Just like the left side, you need to pull out a thin strand from the right outer edge of your hair and pull it over and tuck it under the left side part. Repeat this until you see a pretty tail forming each time you pull a strand over.
You need to continue braiding until you are 2.5 cm away from the end of the tail. Make sure you tighten the loop and make it neat with no corns in between. Once you are done, you need to put a band to hold at the end of the tail to prevent it from unwinding.
- Finish the look
Once you are done, its time to finish the look. this involves tangling the hair to make it more relaxed and if you need it smooth, you need to add a hairspray once you are done. There are also ways your w a make the tail more appealing to the eye. This is by adding colourful bows and ribbons
Weather to go French or regular, it’s your choice. As you have read the technique is simple and easy to master. Might be challenging in the beginning but once you grasp the skills, it can be easy as combing your hair in the morning.
Why should you have a bad hairdo a day? There is no reason why you should with the following skills on hand. All you need to do is follow them step by step and you will be surprised as to how a simple technique can carry you throughout the day.