How to Apply Cream Eyeshadow: Tools, Placement, and Safety
Apply cream eyeshadow in thin layers on clean lids, blend the edges before it sets, and keep the product away from the waterline unless the label clearly supports that use. Cream formulas are easiest when you choose the right tool, start with a small amount, and build color slowly.
Quick Answer: Cream Eyeshadow Steps
Cream eyeshadow is a fast eye-makeup format, but it needs controlled placement. A thin first layer gives you more time to blend and helps reduce slipping or creasing.
| Step | What to do | Why it helps | Common mistake |
|---|---|---|---|
| 1. Start clean | Wash hands and use a clean brush or fingertip | FDA eye-cosmetic guidance emphasizes clean hands and clean tools | Touching the pot with unwashed fingers |
| 2. Use a small amount | Pick up less product than you think you need | Cream spreads farther than powder | Loading the lid with a thick layer |
| 3. Place first | Dot color on the mobile lid or target area | Placement before blending keeps the shape controlled | Dragging color too high too early |
| 4. Blend edges | Tap or sweep the edge before the formula sets | Soft edges look more intentional | Waiting until it dries fully |
| 5. Build slowly | Add a second thin layer only where needed | Thin layers are easier to wear | Trying to get full impact in one pass |
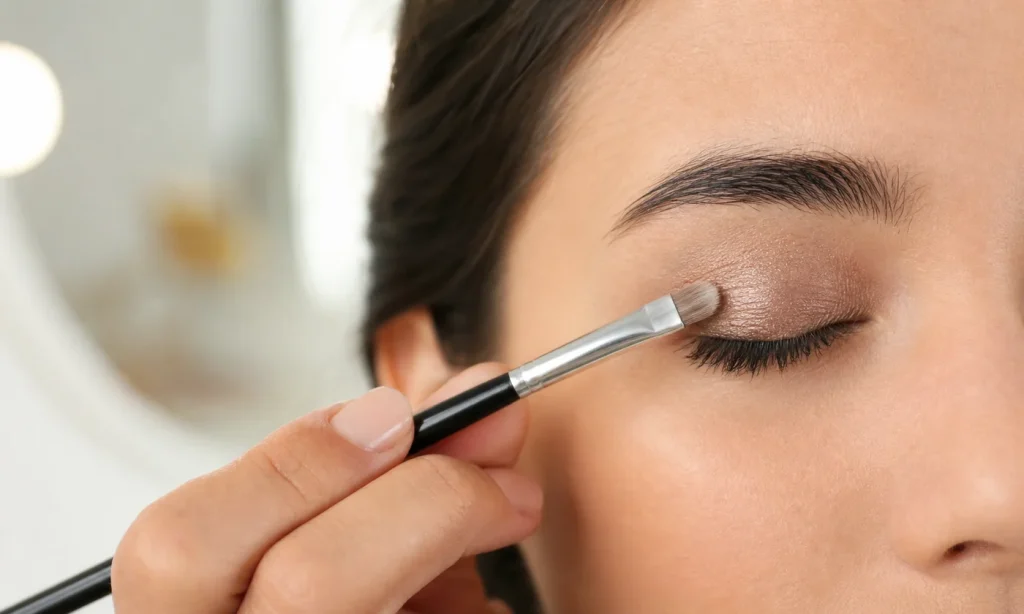
Tool Choice: Finger, Brush, or Sponge Tip
Fingers warm up many cream formulas and can create a quick wash of color. Brushes give more control at the inner corner, outer corner, and lash line. Any tool used near the eye should be clean.
| Tool | Best use | Strength | Watch out for |
|---|---|---|---|
| Clean fingertip | One-shade lid wash | Fast and easy to blend | Less precise near lashes and inner corner |
| Flat synthetic brush | Packing color on the lid | Good control and even placement | Needs cleaning between colors |
| Small detail brush | Inner corner or lower-lid accent | Precise placement | Keep away from the waterline |
| Fluffy brush | Softening the crease edge | Diffuses color quickly | Can move product if used too hard |
| Sponge-tip applicator | Travel touch-up | Simple and compact | Replace or clean often enough |
Where to Place Cream Eyeshadow
Start on the mobile lid if you are learning. For hooded eyes, keep the deepest color close to the lid and blend slightly above the fold while looking straight ahead. For mature or textured lids, thin layers usually sit better than a thick opaque coat.
| Placement | How to apply | Good for | Boundary |
|---|---|---|---|
| Mobile lid | Tap color from lash line toward crease | Everyday one-shade look | Stop before product gets into lashes |
| Outer corner | Use a small brush and blend inward | Soft depth | Use less product than powder |
| Crease edge | Blend only the border | Hooded or lifted shape | Do not drag cream too far upward |
| Inner corner | Use a clean detail brush | Light-reflecting accent | Keep product out of the eye |
| Lower lash area | Use a tiny amount under lashes | Soft smoky definition | Do not apply on the waterline unless labeled for that use |
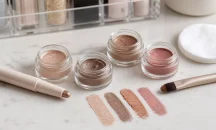
Texture and Finish Choices
Cream eyeshadows come in pots, sticks, liquids, mousses, and cream-to-powder formulas. The right texture depends on your lid type, how much blending time you want, and whether you need a quick wash or defined shape.
| Formula type | Best fit | Application note | Possible issue |
|---|---|---|---|
| Pot cream | Controlled lid wash | Use fingertip or flat brush | Can dry out if left open |
| Shadow stick | Fast everyday look | Draw then blend quickly | Edges can set before blending |
| Liquid shadow | High shine or metallic finish | Use small dots and let them set | Too much can crack or crease |
| Cream-to-powder | Longer wear with softer finish | Blend before it dries down | May look patchy over heavy primer |
| Glitter cream | Accent, not necessarily full-lid daily use | Check eye-area label and use carefully | Particles can fall toward the eye |
How to Reduce Creasing
Creasing is often a layer-thickness problem, not just a product problem. Use a thin layer, keep heavy face cream off the lid, and let each layer settle before adding another product.
- Remove excess skincare or oil from the eyelid before makeup.
- Use an eye primer only if it works with the cream formula.
- Apply one thin layer, then build only where color is missing.
- Set the crease area lightly with powder if your lids are oily.
- Avoid stacking several slippery cream products in the same crease.
Eye-Area Safety Boundaries
The FDA says eye cosmetics need care because of infection risk, applicator injury, and unapproved color additives. It also warns consumers not to use products near the eyes unless they are intended for that use. That matters for cream eyeshadow, especially bright, glitter, multi-use, or face-paint style products.
| Safety check | What to do | Why it matters | Do not |
|---|---|---|---|
| Clean hands | Wash hands before touching lids or jars | Hands can transfer bacteria to the eye area | Apply from a jar with dirty fingers |
| Clean tools | Use clean brushes and applicators | Tools touch sensitive eye-area skin | Reuse dirty sponge tips for months |
| No sharing | Keep eye makeup personal | FDA warns against sharing eye cosmetics | Share cream shadow pots or testers directly |
| Eye-area label | Use products intended for eyes near the eyes | Some color additives are not approved for eye-area use | Use lip liner or face paint as eyeshadow without label support |
| Reaction stop point | Stop using a product that clearly bothers the eye area | Continuing can make the problem harder to judge | Cover discomfort with more makeup |
Simple Cream Eyeshadow Looks
One-shade wash
Tap a neutral or soft shimmer across the mobile lid, then blend the edge with a clean fingertip or fluffy brush. This is the easiest way to learn how fast the formula sets.
Soft smoky lid
Place a deeper cream shade close to the lash line and outer corner, then diffuse the edge before adding more. Keep the deepest area controlled so it does not spread too high.
Bright color accent
Use a detail brush for a small pop on the inner corner or center lid. Check the label carefully when using bright or multi-use pigments near the eyes.
Quick matte base
Use a skin-tone cream shadow as a thin lid base, then add powder shadow only where needed. This works best when the cream layer is not heavy.
Removal and Cleanup
Remove cream eyeshadow gently. Hold remover on the lid briefly, then wipe without scrubbing. If the formula contains glitter or shimmer, remove slowly so particles do not move into the eye.
Sources
FAQ
Can I apply cream eyeshadow with my finger?
Yes, a clean fingertip works well for a quick lid wash. Use a brush when you need more precision around the inner corner, outer corner, or lower lash area.
Should I use primer under cream eyeshadow?
Primer can help on oily lids, but some cream formulas grip better on clean dry skin. Test one thin layer first, then add primer only if the shadow slips or creases.
Can cream eyeshadow go on the waterline?
Do not put cream eyeshadow on the waterline unless the product label clearly says it is intended for that use. Many cream shadows are designed for the eyelid, not the inner rim.
How do I stop cream eyeshadow from creasing?
Use less product, keep skincare away from the lid, blend before the formula sets, and lightly set the crease if your lids are oily. A thick first layer is harder to control.
Is glitter cream eyeshadow different?
Yes. Glitter or sparkle formulas need extra care because particles can move toward the eye. Check that the product is intended for eye-area use and apply it in small controlled areas.
What should I do if cream eyeshadow bothers my eyes?
Stop using that product near your eyes and remove it gently. FDA guidance says consumers should stop using eye cosmetics that cause a bad reaction and seek help if the problem continues.