How To Use An Acrylic Nail Brush
Acrylic nail brushes are an important tool for creating beautiful acrylic nails. In this article, we’ll show you how to use an acrylic nail brush to get the perfect nails.
How do you use an acrylic nail brush
When it comes to giving your nails a flawless finish, an acrylic nail brush is an essential tool. But with so many different types and sizes on the market, how do you know which one to choose? And once you’ve got your brush, how do you use it properly?
Here, we break down everything you need to know about acrylic nail brushes, from the different types available to how to use them like a pro.
What is an acrylic nail brush?
An acrylic nail brush is a small, handheld brush that’s used to apply liquid acrylics to the nails. Acrylic brushes come in a variety of shapes and sizes, but they all have one thing in common: they’re designed to give you a precise, professional-looking application.
The type of brush you choose will depend on your personal preferences and the look you’re going for. For example, if you want a more natural look, you might opt for a smaller brush with softer bristles. If you’re going for a bolder style, you might choose a larger brush with stiffer bristles.
How to use an acrylic nail brush
Now that you know what an acrylic nail brush is and the different types available, it’s time to learn how to use it. Here’s a step-by-step guide:
1. Prep your nails
Before you start applying any product to your nails, it’s important to prep them first. This will help ensure that your manicure lasts longer and looks better. Start by washing your hands thoroughly with soap and water. Then, use a nail file to shape your nails and remove any excess cuticles.
2. Choose your brush
Once your nails are prepped and ready to go, it’s time to select your brush. As we mentioned earlier, there are a variety of brushes on the market, so take some time to experiment until you find the one that works best for you.
3. Pour some liquid acrylic into a dish
Before Dip ·ing your brush into the liquid acrylic, pour a small amount into a separate dish. This will help prevent contamination and waste. Plus, it’ll make it easier to control the amount of product you’re using.
4. Dip your brush into the liquid acrylic
When you’re ready to start applying the product to your nails, dip the bristles of your brush into the liquid acrylic. Be sure to only dip the tips of the bristles into the product; this will help prevent waste and ensure a more precise application.
5. Apply the acrylic to your nails
Once your brush is loaded with product, it’s time to start applying the acrylics to your nails. Begin at the center of your nail and work your way outwards towards the edges. If you’re using a smaller brush, you may need to make multiple strokes to cover the entire surface of your nail. If you’re using a larger brush, you should be able to cover your entire nail in one stroke.
6. Allow the product to dry completely
After you’ve applied the product to all of your nails, set them aside and allow them to dry completely. This usually takes about 10 minutes. Once they’re dry, you can add any additional embellishments, such as polish or gems.
What are the different sizes of acrylic nail brushes

Acrylic nail brushes come in all shapes and sizes. There are round, oval, square, and triangular shaped brushes. The size of the brush depends on the size of the nail you are working on. The smaller the brush, the more precise the application will be. The larger the brush, the faster you can apply the acrylic.
When first starting out, it is best to use a small brush. This will help you get a feel for how much pressure to apply and how much product to use. As you become more comfortable with using an acrylic nail brush, you can move up to a larger size.
There are many different brands of acrylic nail brushes on the market. Each brand has its own unique style and shape. It is important to find a brush that feels comfortable in your hand and that works well with the type of acrylic you are using.
The most important thing to remember when using an acrylic nail brush is to always clean it after each use. Acrylics can dry out quickly, so it is important to keep your brush clean and free of debris.
What is the best brand of acrylic nail brush
Acrylic nail brushes are an important tool for anyone who wants to create beautiful acrylic nails. There are many different brands of acrylic nail brushes on the market, but which one is the best?
To find the best brand of acrylic nail brush, you need to consider a few things. First, what is your budget? There are some great high-end brushes that can cost upwards of $100, but there are also some excellent lower-priced options. Second, what is the size and shape of your hand? This will determine the size and shape of the brush head that you need. Finally, what is your level of experience? If you are a beginner, you may want to opt for a simpler brush with fewer bristles.
Once you have considered these factors, you are ready to start shopping! Here are a few of the best brands of acrylic nail brushes on the market:
1. Kolinsky Sable Acrylic Nail Brush by Bluebird: This brush is handmade with Kolinsky sable hair, which is widely considered to be the best type of hair for an acrylic nail brush. The bristles are firm yet flexible, making it easy to create even, smooth strokes. The brush head is slightly tapered, making it ideal for creating both round and almond-shaped nails. The Bluebird Kolinsky Sable Acrylic Nail Brush costs around $50.
2. Gelish synthetic nylon acrylic nail brush: This brush is made with synthetic nylon bristles that mimic the feel of natural Kolinsky sable hair. The bristles are firm yet flexible, making it easy to create even, smooth strokes. The brush head is slightly tapered, making it ideal for creating both round and almond-shaped nails. The Gelish synthetic nylon acrylic nail brush costs around $25.
3. EZ Flow Professional Acrylic Nail Brush: This brush is made with high-quality synthetic bristles that are designed to mimic the feel of natural Kolinsky sable hair. The bristles are firm yet flexible, making it easy to create even, smooth strokes. The brush head is slightly tapered, making it ideal for creating both round and almond-shaped nails. The EZ Flow Professional Acrylic Nail Brush costs around $15.
4. BBLuv Professional Acrylic Nail Brush: This brush is made with high-quality synthetic bristles that are designed to mimic the feel of natural Kolinsky sable hair. The bristles are firm yet flexible, making it easy to create even, smooth strokes. The brush head is slightly tapered, making it ideal for creating both round and almond-shaped nails. The BBLuv Professional Acrylic Nail Brush costs around $10.
5. CND Creative Play Nail Art Brush: This brush is made with high-quality synthetic bristles that are designed to mimic the feel of natural Kolinsky sable hair. The bristles are firm yet flexible, making it easy to create even, smooth strokes. The CND Creative Play Nail Art Brush has a dual-ended design that includes a thin brush for detailed work and a thicker brush for broader strokes. The CND Creative Play Nail Art Brush costs around $5.
No matter what your budget or level of experience, there is an acrylic nail brush on this list that will suit your needs. So get shopping and find the perfect brush for you!
How do you clean an acrylic nail brush
When it comes to keeping your acrylic nail brushes clean, there are a few different methods you can use. One popular method is to soak the brush in acetone for about 10 minutes. This will help to remove any excess acrylic from the bristles. You can then use a nail brush cleaner or soap and water to remove any remaining residue. Be sure to rinse the brush well and allow it to air dry before using it again.
Another method you can use to clean your acrylic nail brushes is to mix together equal parts vinegar and water. Soak the brush in this solution for about 15 minutes, then rinse it off with warm water. You can also use this solution to disinfect the brush if you’re concerned about bacteria. Just be sure to rinse it well afterwards so that no vinegar residue is left behind.
If you find that your acrylic brushes are starting to get stiff or difficult to work with, you can try soaking them in olive oil for a few minutes. This will help to soften the bristles and make them more pliable. Just be sure to rinse the brush thoroughly afterwards so that no olive oil is left behind on your nails.
No matter what method you use to clean your acrylic nail brushes, be sure to do it on a regular basis. This will help to ensure that they stay in good condition and continue to provide you with great results.
How often should you replace your acrylic nail brush
As a professional manicurist, you should replace your acrylic nail brush every 3 to 4 months. If you notice the bristles starting to fray or splay, it’s time for a new one. A good rule of thumb is to never use the same brush on more than one client.
Acrylic brushes come in a variety of shapes and sizes, so choose one that fits comfortably in your hand and is the right size for the nails you’re working on. For example, if you have small hands, you might prefer a smaller brush.
The type of brush you choose is also important. Some brushes are made with natural bristles, while others are synthetic. Synthetic brushes are often less expensive and easier to care for, but they may not provide the same level of control as natural bristles.
When shopping for an acrylic nail brush, look for one that has a metal ferrule (the part that attaches the bristles to the handle). This will help ensure that the bristles stay in place and don’t come loose over time.
Finally, pay attention to the way the bristles are arranged. Some brushes have straight bristles, while others have curved or pointed tips. Straight bristles are best for creating smooth, even strokes, while curved or pointed tips can help you create different effects.
With so many options available, choosing the right acrylic nail brush can seem overwhelming. But if you take the time to find one that fits your needs and preferences, you’ll be sure to create beautiful nails that your clients will love.
What type of bristles are best for an acrylic nail brush
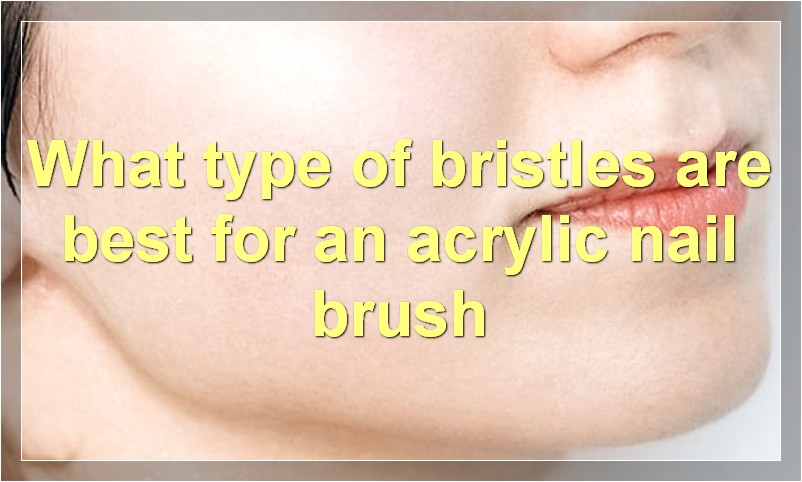
When it comes to choosing the right type of bristles for an acrylic nail brush, there are a few things to consider. The first is the density of the bristles. You want bristles that are densely packed together in order to create a smooth, even application of the acrylic product. The second consideration is the stiffness of the bristles. You want bristles that are stiff enough to evenly distribute the product, but not so stiff that they cause streaks or lines in the finish. Finally, you want to choose a bristle material that is durable and easy to clean. Synthetic materials like nylon or polyester are ideal choices.
How do you store an acrylic nail brush
Acrylic nail brushes are an important tool for creating beautiful acrylic nails. If you are a professional or enthusiast, you need to know how to store your brushes properly to keep them in good condition. Here are some tips on how to store your acrylic nail brushes:
1. Always store your brushes in a clean and dry place.
2. Make sure the bristles of the brush are pointing downwards when stored, so that they don’t get damaged.
3. You can store your brushes in a special brush holder or container, or simply wrap them in a clean cloth.
4. Never leave your brushes in direct sunlight or in a humid environment, as this can damage the bristles.
5. Clean your brushes regularly with soap and water, and use a brush cleaner if necessary.
By following these simple tips, you can ensure that your acrylic nail brushes will last for many years.
What is the difference between an acrylic nail brush and a regular nail brush
If you’re a nail technician, or even just someone who likes to do their own nails at home, you know there are different types of brushes for different purposes. Acrylic brushes are typically used for doing acrylic nails, and regular brushes are used for regular polish applications. But what exactly is the difference between an acrylic nail brush and a regular nail brush?
The biggest difference between an acrylic nail brush and a regular nail brush is the size and shape of the bristles. Acrylic brushes have longer, thinner bristles than regular brushes. This is because acrylic nails require a more precise application than regular polish. The long, thin bristles of an acrylic brush allow you to get a more detailed application of the product.
Another difference between an acrylic nail brush and a regular nail brush is the way the bristles are cut. Acrylic brushes have straight bristles, while regular brushes have rounded bristles. The straight bristles of an acrylic brush help to create a smoother application of the product.
Finally, the materials that are used to make the two types of brushes are different. Acrylic brushes are typically made with synthetic materials, while regular brushes are made with natural materials like sable hair. The synthetic materials that are used to make acrylic brushes are more durable and less likely to break than the natural materials that are used to make regular brushes.
So, what is the difference between an acrylic nail brush and a regular nail brush? In short, it all comes down to the size, shape, and material of the bristles. Acrylic brushes have longer, thinner bristles than regular brushes; they also have straight bristles instead of rounded bristles. And while regular brushes are typically made with natural materials like sable hair, acrylic brushes are usually made with synthetic materials.
Can you use an acrylic nail brush on natural nails
If you’re anything like me, you’re probably always looking for ways to make your manicure last longer. And if you’re also like me, you’re probably always looking for ways to do your nails at home instead of spending money at the salon. I’ve tried plenty of at-home manicure methods, and one of my favorites is using an acrylic nail brush on my natural nails.
I know, it sounds counterintuitive. But trust me, it works! The key is to find a good quality acrylic nail brush that’s not too harsh on your nails. I like to use a soft bristle brush because it’s gentle enough for my natural nails but still does a great job of getting rid of any dirt or debris.
To use the brush, simply dip it in some warm water and then lightly scrub your nails. You don’t need to use any soap or shampoo; the warm water will be enough to loosen up any dirt or grime. After a minute or so of scrubbing, rinse your nails off with cold water and dry them thoroughly.
Now take a look at your nails! They should look shiny and new, without any sign of dirt or grime. And if you want your manicure to last even longer, consider applying a clear top coat or base coat before painting your nails with your favorite color polish.
What are some tips for using an acrylic nail brush
If you’re looking for tips on how to use an acrylic nail brush, you’ve come to the right place. In this article, we’ll share some expert tips on how to use an acrylic nail brush to get the best results.
First, let’s start with the basics: what is an acrylic nail brush? An acrylic nail brush is a tool used to apply and shape acrylic nails. It typically has a long, slender handle and a round, firm bristled head.
Now that we know what an acrylic nail brush is, let’s talk about how to use it. One of the most important things to remember when using an acrylic nail brush is to always dip the bristles in water before dipping them into the acrylic powder. This will help to prevent the bristles from absorbing too much powder and becoming clogged.
Once the bristles are wet, dip the brush into the powder and tap off any excess. Then, starting at the base of the nail, stroke the brush up towards the tip. Be sure to apply even pressure as you go so that the acrylic is evenly distributed.
After you’ve applied the acrylic to all of your nails, it’s time to shape them. Using the tip of the brush, gently push the excess acrylic down and away from the cuticle area. You can also use the brush to create a smooth, rounded edge by stroking it along the edge of the nail.
Finally, once you’re happy with the shape of your nails, use a clean brush to buff them until they’re shiney and smooth.
Now that you know how to use an acrylic nail brush, put these tips into practice and see for yourself how easy it is to achieve salon-worthy nails at home!